Manually writing checks has become as outdated as waiting for telegrams. Every sophisticated financial system allows you to define and print checks from system automatically ; so does Sage 300 ERP with a click of a button. Let’s see how you can simplify your work and relax while system takes care of meticulous details to be written on check.
You can print all check elements such as Payee, Date, and Amount on check through sage 300 ERP. You can also print check with advice in system. Following are the easy steps to print check from system:
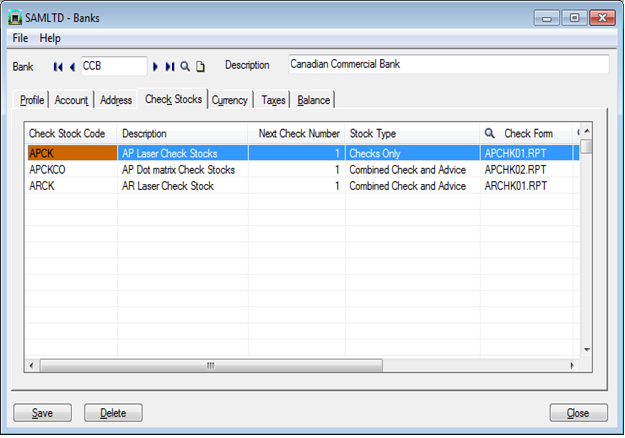
I. Define Check Stock
In bank service module you have to define check stock for respective bank. In check stock following are the important factors you have to configure:
1. Check stock Code: If you are setting up check printing information for a bank, type a unique code, up to six alphanumeric characters, to identify your check stock. The check stock is composed of the physical check forms, combined with report specifications and the check language.
2. Description: Type description for check code.
3. Next Check No: When you print checks for your program, Bank Services assigns numbers sequentially to the checks in the batch, beginning with this number.
4. Stock Type: Select one of the four following Stock Types:
a. Combined Check and Advice: Select this type if your printed check forms contain the advice portion on the same page as the check.
b. Checks Then Advices: Select this type if you use different forms for checks and advice slips. The program prints all the checks first, prompts you to load the advice forms, then prints the advices.
c. Checks Only: Select this type if you want to print checks only.
d. Advices Only: Select this type if you want to print advices only. This would most likely be the case if you write manual checks and want an individual printout for each check, to keep track of payments.
5. Check form: If you print checks only, or checks combined with advices, type the file name of the Crystal Report specification for the check form.
6. Advice form: If you print advices only, or advices following checks, enter the file name of the report specification for the advice form
7. Advice Line per page: Enter a number for the printed detail lines that will fit on the advice form or in the advice section of the check form (for combined checks and advices)
8. Language for Checks: Select one of the installed languages for Bank Services to be used in printing the body of the check (i.e. The date, written amount, and numerical amount).
The New Stuff: AP Check Stock setting in Sage 300 ERP
II. AP Payment Entry

In payment entry keep the Print check Option checked. After entering respective details of Payment click on Add button. If you are authorized person for printing checks, then ‘Print Check’ button will appear on the screen. Click on Print check button.
After this configuration the next check no. will appear on the screen.
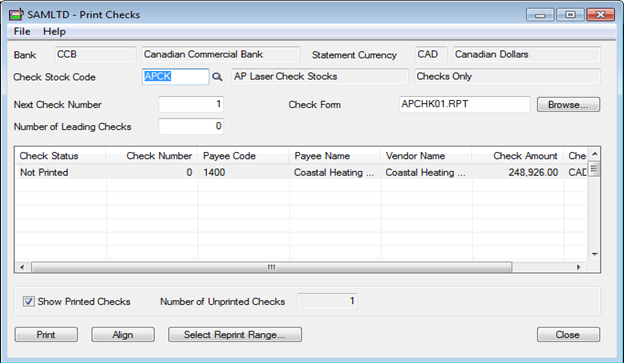
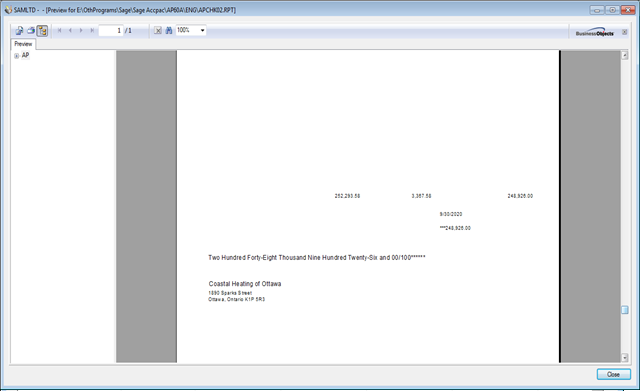
Click on Print button to preview and print the check.
Using this we can configure our check stock in system and reduce the data entry effort of manually creating checks for each and every payment. This will also let your users concentrate on more efficient usage of their time as compared to doing menial repetitive tasks.
Also read:
1) Purchase order transaction Flow in Sage 300 ERP
2) Recurring Payable in Account Payable module of Sage 300 ERP
3) Choosing Vendor Contract Cost over IC Vendor Detail Cost in Sage 300 ERP
4) AP Invoice Retention in Sage 300 ERP