The Inter-site transfers function is used to intervene on a stock line or a group of stock lines so as to transfer stock from one site to another for one or several companies.

The Inter-site transfers function is used to intervene on a stock line or a group of stock lines so as to transfer stock from one site to another for the one or several companies.
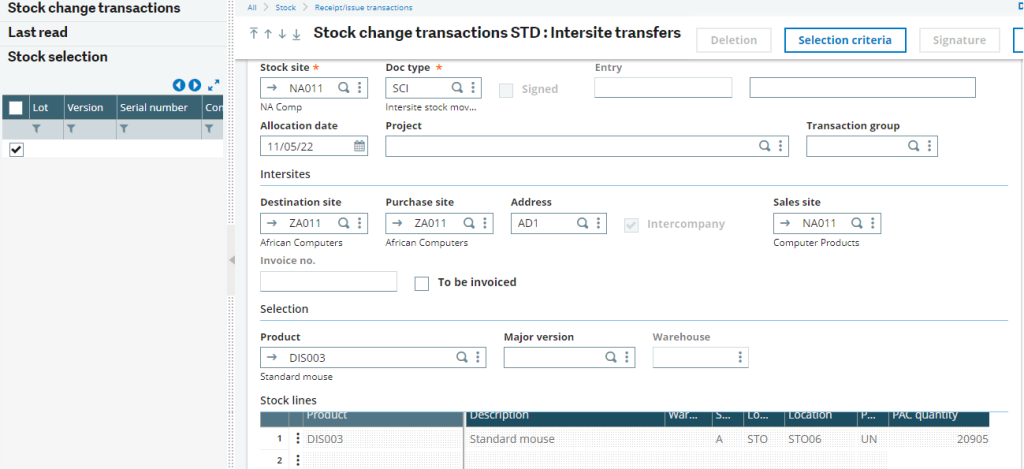
The Inter-Site Transfer screen can be accessed by navigating through Inventory->Receipt/Issue transactions->Inter-Site Transfers (Process name: GESSIS)
The Inter-Site transfer will transfer only an already created receipt (The receipt can be a Purchase Order Receipt or a Manual Inventory Receipt) to different destination Site. Note that you cannot manually create a new receipt from one location to another. So if you need to create a stock transfer, say from location D22 to P21 then firstly, you will have to create either a manual Stock Receipt from Inventory or a Receipt from purchasing module at location D22. Once you have created a receipt for your desired product at location D22, open the inter-site transfer screen and enter the source and the destination site (which would be D22 and P21 in our example). The ‘Site’ field acts as the Source site and the field ‘Destination Site’ acts as the Destination Site. You then need to enter the product for which you are creating an Inter-Site Transfer in the field Product.
Note that in the Inter-Site Transfer screen we cannot add an item by double-clicking in the Product field displayed in the grid.
Once you have entered the Product code click on ‘Stock Selection’ in the Left Browser. You will be able to see all the receipts that were made at Location D22 for the Product that you have selected in the Screen. Select the receipts that you wish to transfer by the clicking on the receipt line from the Left Browser. The selected receipt line will get populated in the Stock Lines Grid. You can also edit the quantities in the line if required.
Click on ‘Create’ Button to transfer the selected quantities from location D22 to P21. And there you go. You have successfully created your Inter-Site Transfer.
These easy steps in this blog post show us how to perform Inter-Site Transfers in Sage X3.
About Us
Greytrix – a globally recognized Premier Sage Gold Development Partner is a one-stop solution provider for Sage ERP and Sage CRM needs. Being recognized and rewarded for multi-man years of experience, we bring complete end-to-end assistance for your technical consultations, product customizations, data migration, system integrations, third-party add-on development and implementation expertise.
Greytrix caters to a wide range of Sage Enterprise Management (Sage X3) offerings – a Sage Business Cloud Solution. Our unique GUMU™ integrations include Sage Enterprise Management (Sage X3) for Sage CRM, Salesforce.com and Magento eCommerce along with Implementation and Technical Support worldwide for Sage Enterprise Management (Sage X3). Currently we are Sage Enterprise Management Implementation Partner in East Africa, Middles East, Australia, Asia. We also offer best-in-class Sage X3 customization and development services, integrated applications such as POS | WMS | Payment Gateway | Shipping System | Business Intelligence | eCommerce and have developed add-ons such as Catch – Weight and Letter of Credit for Sage Enterprise Management to Sage business partners, end users and Sage PSG worldwide.
Greytrix is a recognized Sage Rockstar ISV Partner for GUMU™ Sage Enterprise Management – Sage CRM integration also listed on Sage Marketplace; GUMU™ integration for Sage Enterprise Management – Salesforce is a 5-star app listed on Salesforce AppExchange.
For more information on Sage X3 Integration and Services, please contact us at x3@greytrix.com. We will be glad to assist you.