Sage X3 – Tips, Tricks and Components
Greytrix is one of the oldest Sage Development Partner offering quality services of two decades for Sage product lines and have been awarded "Sage Partner of the Year" multiple times. Greytrix has a very strong technical and functional team of professionals and experts with hands-on experience in Sage X3. In these blogs, Greytrix will endeavour to share its knowledge with regards to implementation, training, customization, components, current technology trends and help users to understand in depth techno – functional aspects of Sage X3! Contact Greytrix Sage X3 Certified Specialists Team at x3@greytrix.com
Follow us on LinkedIn Follow us on Twitter Follow us on Facebook Follow us on YouTube
Skip to content
  • Home
  • Sage X3 Products
  • Sage X3 Services

Steps to add logo on ESS portal

By Greytrix | December 11, 2019
0 Comment

This feature is used when the user wants to upload the company logo or need to update the existing logo on the ESS portal.

For adding a new logo and to update the existing logo, a user needs to access the same screen.

Only admin users can access this page.

The Prerequisites before uploading the Logo are as follows: –

  • Dimensions required for uploading the logo are: 80*47 px
  • The logo name must be: logo.gif

Steps for adding/ updating the company logo: –

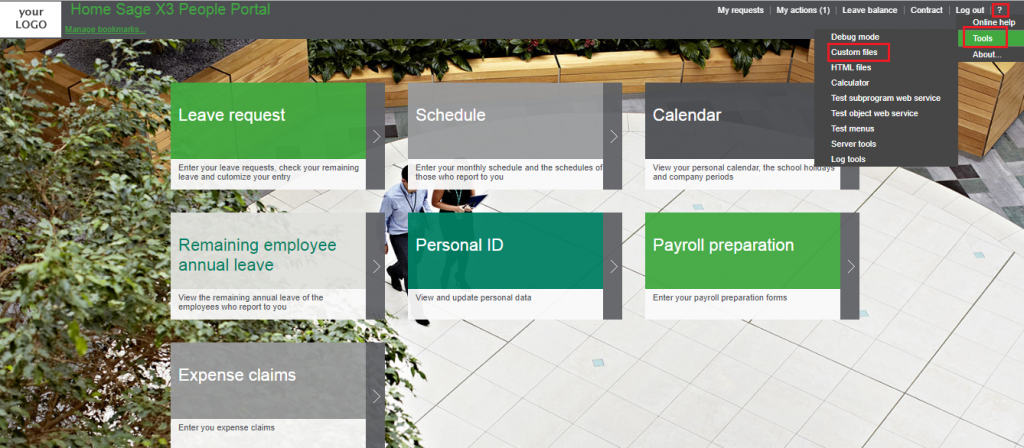
1. ESS Portal Homepage:

Navigation: – Access the portal > click on “?”option > click on Tools > Custom files.

ESS Portal homepage
ESS Portal homepage

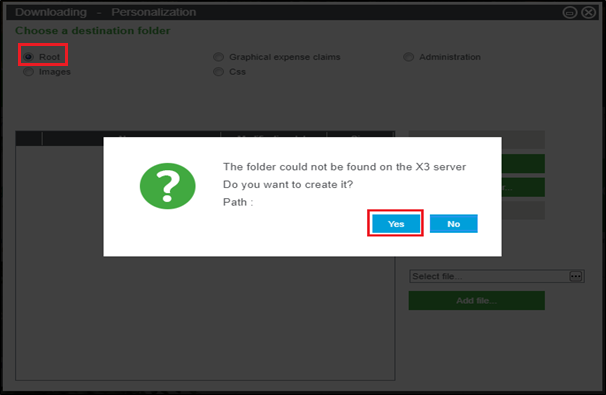
If there is no default folder available in Root folder, then system will ask you to create the folder, click on Yes to create the folder as shown below.

Destination Folder root option

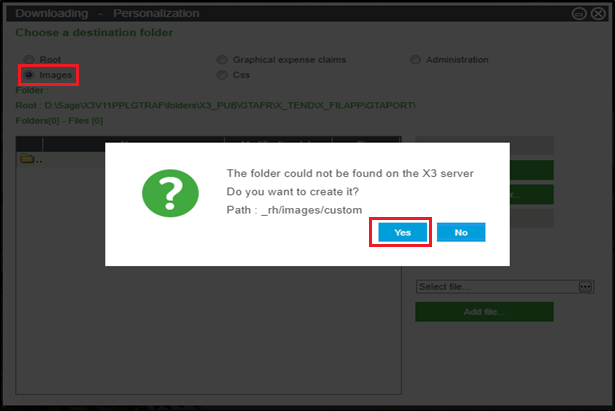
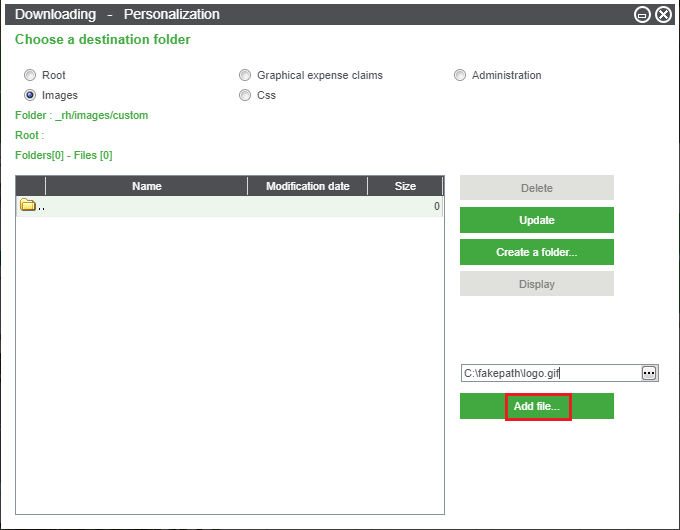
2. Select Images option from destination folder

Note: – If there is no default folder available in Images folder, then system will ask you to create the folder, click on Yes to create the folder as shown below

Destination folder images option

3. Click on select file option

select file option
select file option

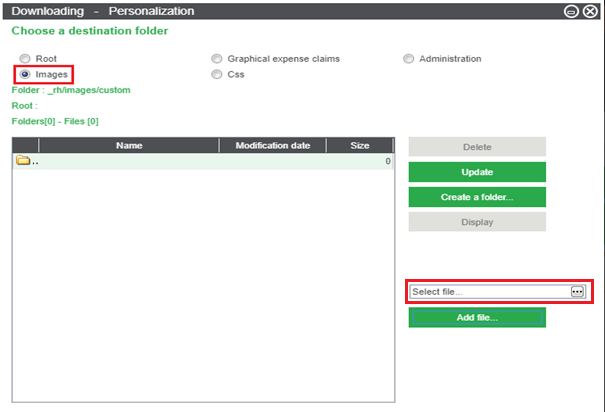
4. Select the image file from the drive as shown below, after selecting the image click on the Open button.

logo selection page
logo selection page

5. Click on Add file button.

Add File option
Add File option

6. Once you have added the file, system will give a pop-up click on Yes button

Logo Confirmation Option

7. Logo file will get added as shown below

Logo Updated
Logo Updated

Log out from the ESS portal and log in again for changes to get effective in the portal.

Company Logo will get displayed in the highlighted area as shown below.

Logo Upated on ESS Portal

So this is how the company logo can be added/updated by the admin users.

Related Posts

  • Adding the logo on Sage Enterprise Management Portal
  • How to add language in Sage X3
  • How to configure portal expense claims in Sage X3
  • Add Menu Profile in Sage ERP X3
  • How to setup expense notes defaults and maximums on portal in Sage X3
Category: Features Sage X3 PPL standard Tags: Adding the logo, Admin, Employees, ESS Portal, Homepage, Sage, x3 people
Post navigation
← Error while configuring console in Sage X3 installation Configuring Financial Data Extraction in Sage X3 with Type of extraction as Account root →
traceability management erp webinar

Greytrix Website and Blogs

  • Greytrix
  • Greytrix Africa
  • Greytrix Australia
  • Sage 100 & 500 ERP Tips and Tricks
  • Sage 300 – Tips, Tricks and Components
  • Sage CRM – Tips, Tricks and Components
  • Salesforce.com Tips and Tricks by Greytrix
  • Sage Intacct – Tips, Tricks and Components
sage crm and sage x3 integration

Categories

  • Configuration
  • Debug
  • FAQ
  • Features
  • Installation
  • Integration
  • Sage X3 Consulting
  • Tips

Archives

Awards

Greytrix Top ISV Partner
Greytrix Revenue Growth Enterprise Business
Greytrix Africa Highest Revenue
Greytrix Prtner of the Year
Greytrix Partner Award
Copyright 2022
Sage X3 – Tips, Tricks and Components
Iconic One Theme | Powered by Wordpress