Crystal report is a business intelligence application used to design and generate reports from a wide range of data source. It supports connectivity to various data sources such as Microsoft excel, SQL server, Oracle and more. It includes major features such as formulas, cross-tab reports, sub-reports, and conditional formatting etc. In crystal report sub-reports are used to embed one report within another. Sub-reports can be helpful when you need to display related or supplementary information alongside the main report.
New Stuff: Approval Status on GRN in Sage X3
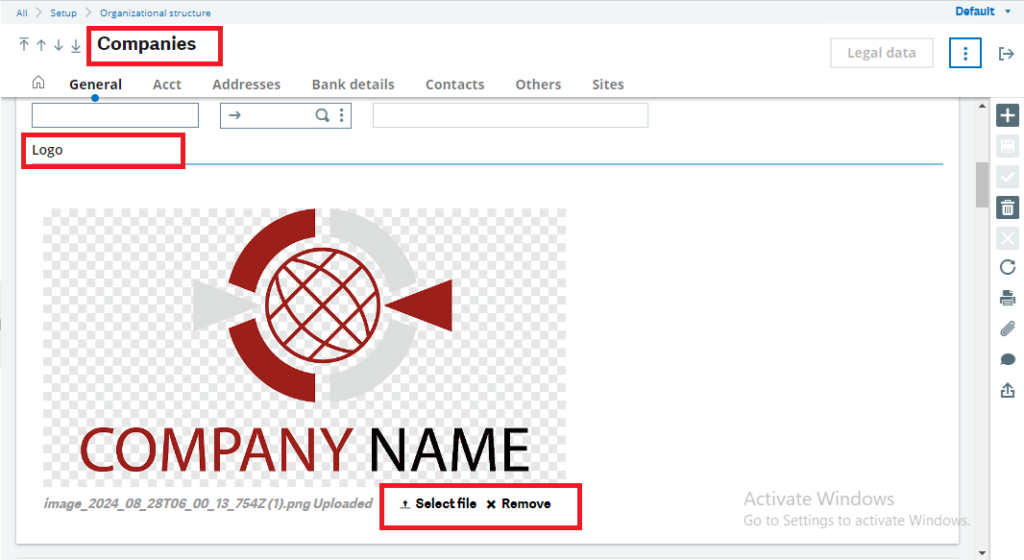
In Sage X3, the client wants a logo on every transaction report. We could directly add a hardcoded logo to the reports, but this would create issues in the future when the client changes the company logo, as we’d need to update the hardcoded logo in every report. It is better to use a dynamic approach. Sage X3 offers a built-in option in the application to add or select the company logo in the company master. By using this feature, we can include a dynamic logo in each report.
To achieve the above requirement, follow the steps below:
Step 1: Open your main report in Crystal Reports and insert a new sub-report into the page header, placing it on the left or right side of the section according to the client’s preference for the logo. You can create a simple query-level or table-level report, as you only need to fetch one field from the table. Refer to the screenshot below for guidance.
Step 2: We have created a table-level sub-report where we have used the BLOB_0 field from the ABLOB table. This field stores the path/name of the company logo from the company master. Drag and drop this field into the report footer section of the sub-report and add suppress blank section condition on report footer section. Refer the below figure for reference.
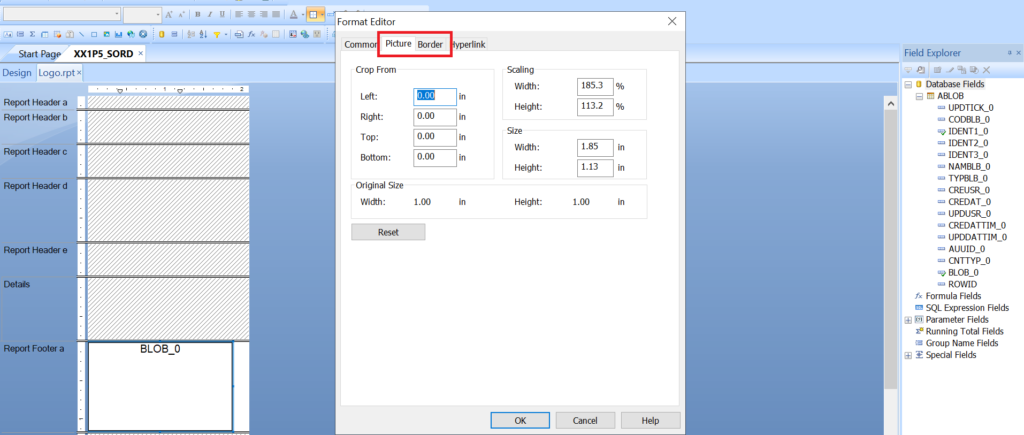
Step 3: You can adjust the logo size according to the client’s requirements. To set the size of the logo or picture, right-click on the BLOB_0 field, select the “Format Graphic” option, then go to the “Picture” tab. There, you can set the height and width of the logo using the available options. You can also set a border for the logo by using the “Border” tab, which is located next to the “Picture” tab. Refer to the screenshot below for guidance.
Step 4: Save the sub-report and link it to the main report. Deploy the updated report to the desired folder, and you will get the desired output on the report.

In this way, we can print dynamic Company Logo on Sage X3 Reports by following simple steps as mentioned in this blog.
[about_us_blog_common]