Sage X3 provide us multiple ways to sign a record in workflow process. There are various ways which helps user to save their time. Basically a user goes manually to a particular transaction and searches the record and then signs the record, this process is bit time consuming but we have few different methods to sign the workflow which are more easy and time saving.
Below are the ways to sign a workflow.
*Manual signature.
*Landing page signature.
*Workflow monitor.
*Signature from link.
MANUAL SIGNATURE:
This is the basic way to sign a particular record which we have already introduced. Here user manually goes to the particular transaction, searches the record, clicks on signature button and makes the signature.
LANDING PAGE SIGNATURE:
We have a standard landing pages for some modules in X3 i.e. sales workflow and purchase workflow. In these landing pages we get all essential information of a particular record such as record number, business partner, amount, sender etc. It has an action button form where we are allowed to accept or reject the particular record.
WORKFLOW MONITOR:
We can also perform signature from workflow monitor.
Navigation: USAGE -> USAGE -> WORKFLOW MONITOR.
You can select the entry transaction according to your module.
As in above figure we can see we also have the information of the record and we have action button where we can select the signature option and accept or reject a particular record.
SIGNATURE FROM LINK:
As we know when a workflow is triggered a notification is been sent to the recipient that notify them to sign a record. As we can see the kind of link recipient receives in the email.
But if user want to sign from the link, they’ll have to do the below steps once before the workflow is triggered. When we click on the link, it redirect to a webpage which shows a message as shown in the below screenshot.
- Navigate SETUP -> GENERAL PARAMETER -> PARAMETER VALUE ->SUPERVISOR
Jump to the details for WRK group and set a directory (path) into the WRKRMTDIR parameter as shown in the below screenshot.

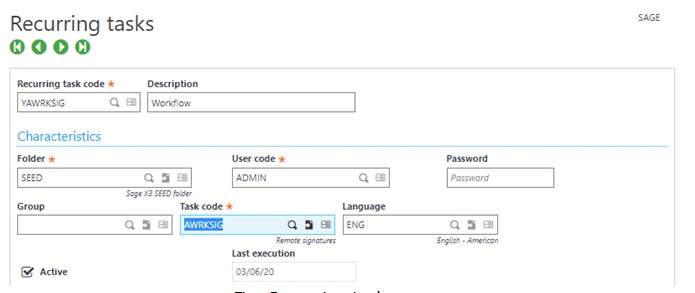
2. Create a recurring task of the standard task ‘AWRKSIG’ and make sure this batch task is created and is running in background before we click on the link.
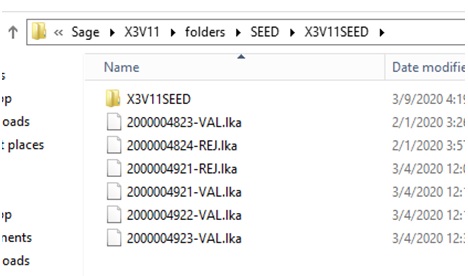
What happens is when we click on the link, a file with .lka extension get created in the directory which is set in the WRKRMTDIR parameter (refer the below figure) and the batch AWRKSIG picks these files and verifies the type of file (i.e. can be for VALIDATION or REJECTION) and processes the signature accordingly.
Hence above are all the various ways to perform signature in workflow which helps user to do signature in more convenient way.
About Us
Greytrix – a globally recognized and one of the oldest Sage Development Partners is a one-stop solution provider for Sage ERP and Sage CRM organizational needs. Being acknowledged and rewarded for multi-man years of experience and expertise, we bring complete end-to-end assistance for your technical consultations, product customizations, data migration, system integrations, third-party add-on development, and implementation competence.
Greytrix has some unique integration solutions developed for Sage CRM with Sage ERPs namely Sage X3, Sage Intacct, Sage 100, Sage 500, and Sage 300. We also offer best-in-class Sage ERP and Sage CRM customization and development services to Business Partners, End Users, and Sage PSG worldwide. Greytrix helps in the migration of Sage CRM from Salesforce | ACT! | SalesLogix | Goldmine | Sugar CRM | Maximizer. Our Sage CRM Product Suite includes addons like Greytrix Business Manager, Sage CRM Project Manager, Sage CRM Resource Planner, Sage CRM Contract Manager, Sage CRM Event Manager, Sage CRM Budget Planner, Gmail Integration, Sage CRM Mobile Service Signature, Sage CRM CTI Framework.
Greytrix is a recognized Sage Champion Partner for GUMU™ Sage X3 – Sage CRM integration listed on Sage Marketplace and Sage CRM – Sage Intacct integration listed on Sage Intacct Marketplace. The GUMU™ Cloud framework by Greytrix forms the backbone of cloud integrations that are managed in real-time for the processing and execution of application programs at the click of a button.
For more information on our integration solutions, please contact us at sage@greytrix.com. We will be glad to assist you.