Step 1 : Start the Batch server
- In Sage X3, Batch server is a component of the software that is responsible for executing batch processes. Batch processes are typically large-scale, repetitive tasks that need to be performed in the background, such as data imports, report generation, data updates, and other automated operations.
- Path : All -> Administration -> Endpoints -> Batch server.
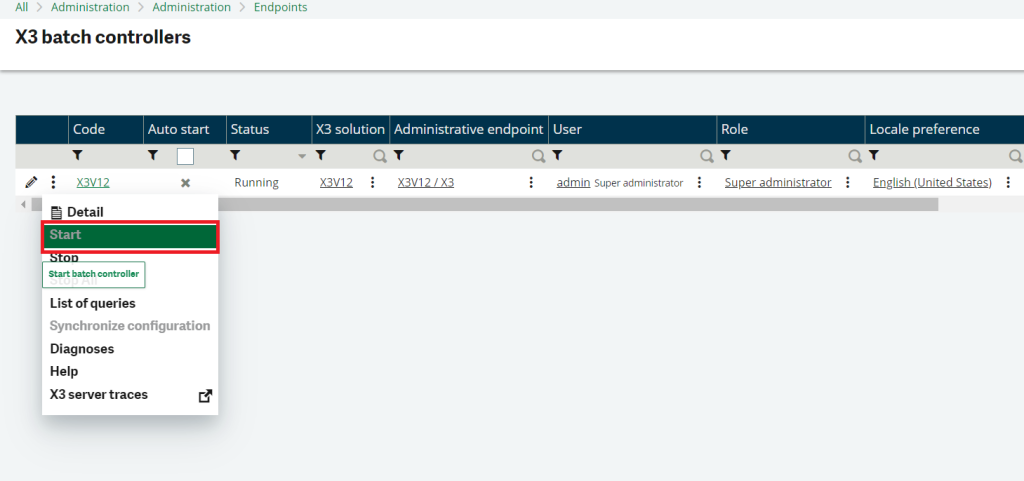
- Click the “Start” option by clicking on the three-dot “Action” button.
Step 2 : Create a Task code in task management.
- Path : All -> Usage -> Batch server -> Task management.
- Task management within Sage X3 typically refers to the process of organizing, tracking, and managing various tasks.
NOTE : Choose “Task” for processing in functions or select “Script” as the task type for subprograms.
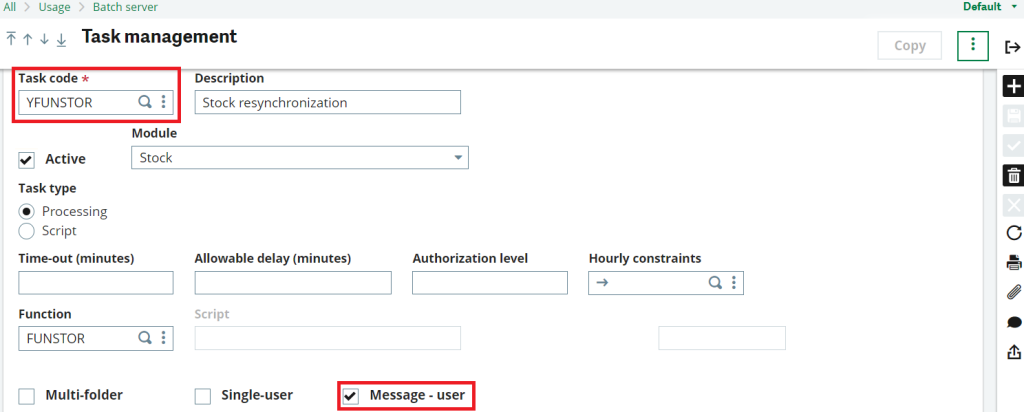
Fig 2 : Task management
- Make a new task code.
- Choose “Processing” as the task type.
- Specify the function you want to call in the ‘Function’ field for this task code.
- Tick the ‘Message – User’ box.
Step 3 : Creating a workflow.
- Path : All -> Setup -> Workflow -> Workflow rules.
- Duplicate the ‘ENDREQ’ Standard workflow.
- Set the event type to ‘End of task.’
- In the event code field, enter the task code you are using for log traces, like ‘YFUNSTOR’ for Stock resynchronization and control as an example.
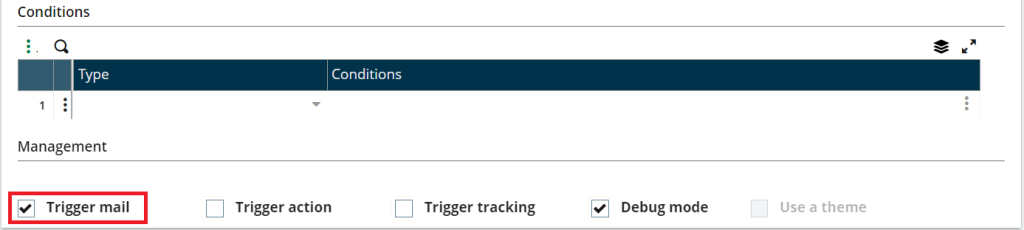
- On the General tab, mark the ‘Trigger Email’ box, which will send an email to the specified recipient ID.
- If necessary, enable the ‘Debug mode’ checkbox for log traces/log files after processing.
- Enter the recipient’s ID in the Recipient field within the Recipient tab and proceed with the following steps.If required enter conditions or else put it blank.
- Ensure that the “Send email” option is set to ‘YES.’
- Set the milestone to ‘NO.’
- Select the “Delegate option” as ‘NO.’

- Tick the ‘Linked trace file’ checkbox in the Message tab.
Step 4 : Query submission.
- Path : All -> Usage -> Batch server -> Query submission.
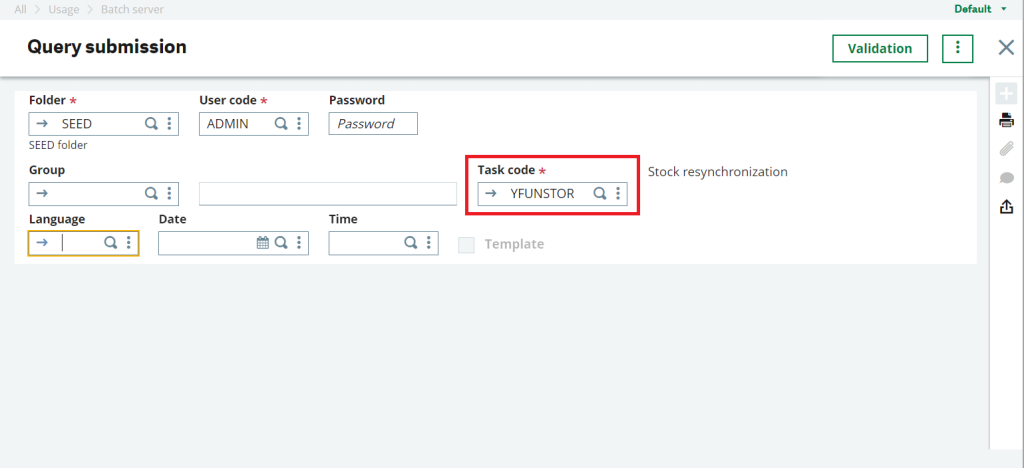
- In the Query submission section, provide the task code you wish to call.
- Click the validation button located in the top-right corner.
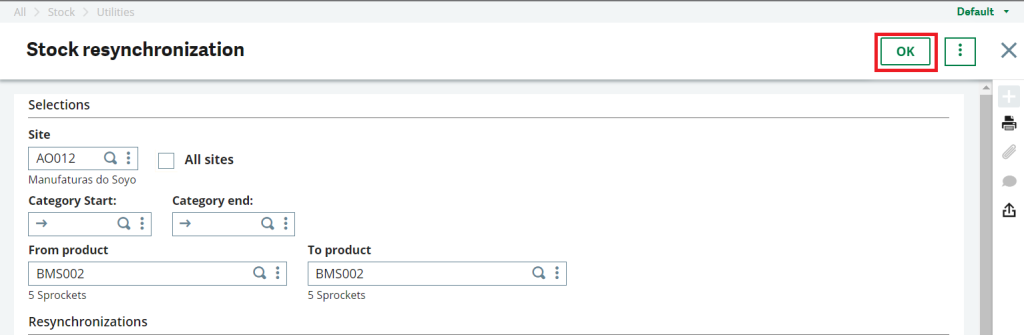
- Upon clicking the Validation button, a screen will open, showing the linked function.
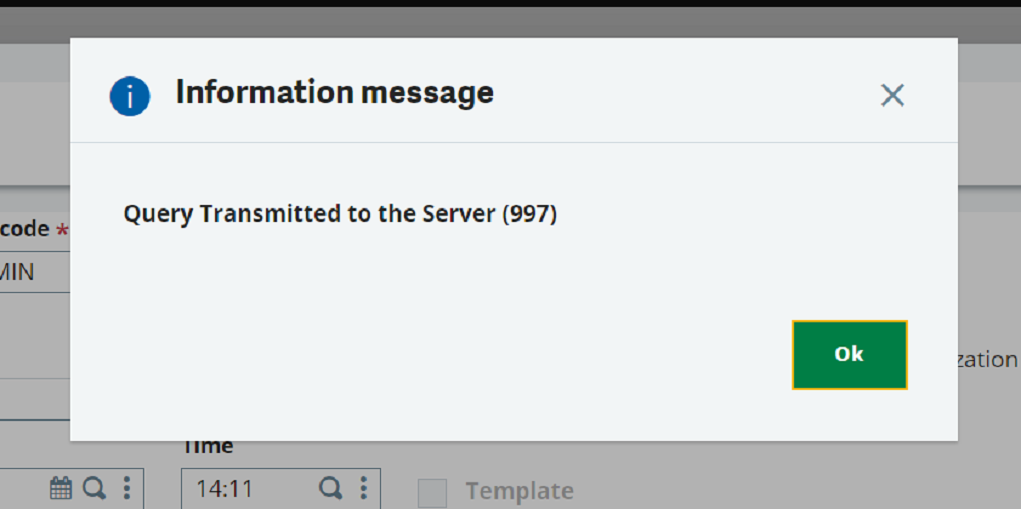
- Input the necessary data, click the ‘OK’ button, and a query will be created and displayed in the message box.
Note: You can verify the query in Query management.
Step 4 : Query management.
- Path : All -> Usage -> Batch server -> Query management.
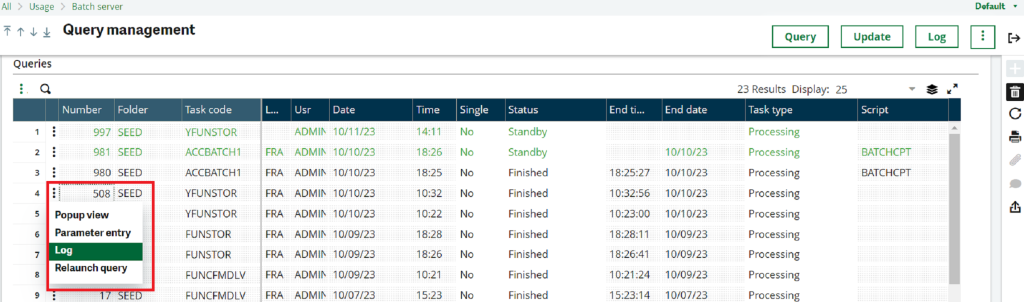
- You can observe that following the Query submission, there is a function listed in the Task code column. The status of the query can be found in the Status column, with ‘Standby’ indicating it’s processing and ‘Finished’ indicating that the query has been executed.
- To view the most recent query, click the Update button located in the top-right corner.
- In the Task code section, you’ll find the task code you created during the ‘query submission’ process.
- Under the Status column, you can verify the status of the query.
- The Task type column displays whether the query is function-based or script-based.
- To access the log file, click the three-dot “Action” button and select “Log.” This will display the log file for the process.
- Once the status changes to “Finished,” the recipient will receive an email containing the log trace file.
In this way we can send a log trace file via email using the standard process.