Crystal Reports is a business intelligence tool that creates custom reports by capturing data from multiple sources. The tool offers features such as data access, report design, data formatting, report viewing, and application integration. In Sage X3, we have various standard reports for almost every screen, which are developed in Crystal Reports.
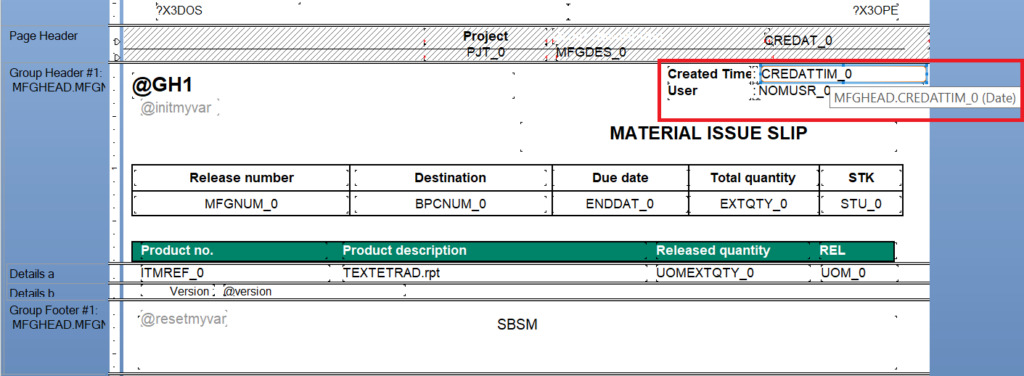
Recently, we had a requirement from one of our client in Sage X3. They wanted the work order creation date and time in the Material Issue Notes (BSM) standard report. In the database, there is already a field named ‘CREDATTIME’ with a date-time data type. We are trying to fetch this field in the report, but only the date part is being displayed. We tried to format this field in Crystal Reports, but it does not show any option to display the time.
When we tried adding the same database date-time field in a newly created report, the field displayed both the date and time parts correctly. The above-mentioned issue occurs when a report was created in Crystal Reports 8 or earlier, and the report option “Convert Date-Time Field” was set to only show the date.
The report option to convert a date-time field to a date or a string no longer exists in Crystal Reports 9 and above. However, if the report was created in an older version and this option was used, it will honor the setting and display it in those reports.
To modify the setting, follow the steps below:
New Stuff: Dashboard Filtering in Sage Enterprise Intelligence(SEI)
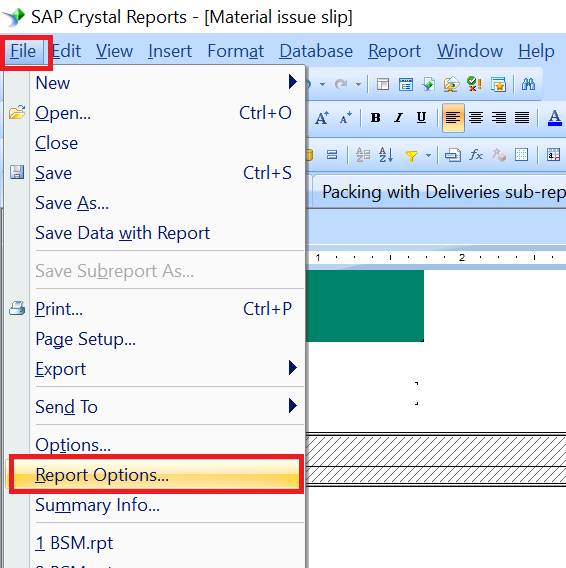
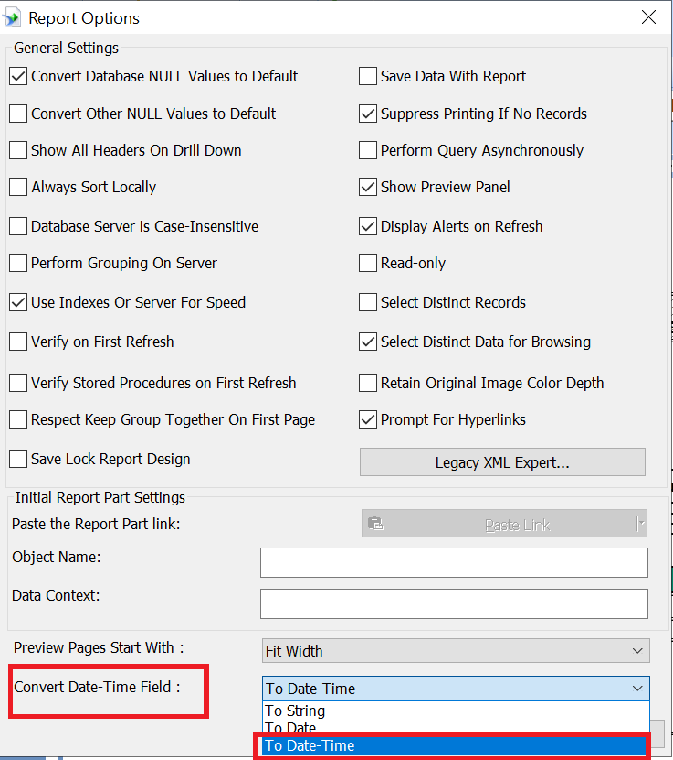
Step 2: Go to the File menu, and under the File menu, select the “Report” option. In the “Report Options” window, for the option “Convert Date-Time Field”, select “To Date-Time”. Now the field will appear on the report with the date-time data type. For better understanding refer the below screenshots.
Step 3: Click on “OK”. Save the report and deploy it in desired folder you will get a desired output as shown in below figure.

In this way, we can display both date and time part in older version of crystal report by following simple steps in crystal report as mentioned in this blog.
[about_us_blog_common]