• Who We Are
    • About Us
    • Factor - D
    • Our Networks
    • Accolades
  • What We do

    SERVICES

    • Consulting / Implementation
    • Migration
    • Development

    OUR SOLUTIONS

    • GUMU Integration
    • BPortaly
    • Sales Commission
    • Shipping
    • IOT

    COMPREHENSIVE SERVICES FOR

    ERP

    • Acumatica
    • Sage Intacct
    • Sage X3
    • Sage 300
    • Sage 100
    • Sage 500

    CRM

    • Salesforce
    • D365 CRM
    • Sage CRM
    • Creatio
    •  

    Other Solutions

    • E-commerce
    • EDI
    • POS
    •  
    •  
  • Resources
    • Case Study
    • Blogs
    • Videos
    • Ebooks
    • News
  • +1 888 221 6661
Contact us
Career |
  • Africa
  • Middle East

Sage X3 – Tips, Tricks and Components

Discover the unmatched potential of Sage X3 with our exclusive blogs. Greytrix is a seasoned Sage expert offering a comprehensive range of Sage X3 services to empower businesses with higher productivity and growth. Here, we share our knowledge and the latest technology trends on Sage X3 through insightful blogs, aiming to enhance your understanding of Sage X3 as an ERP software. Stay updated with our regular posts to leverage the ERP to its full potential.

How to Create a New User Login in Sage X3

By Greytrix | April 1, 2024
0 Comment

Creating a new user login in Sage X3 is a simple process. Begin by accessing the Users section within the Administration module via All -> Administration -> Administration -> Users. Click on “Actions” and select “New User.” When you choose “New User” in Sage X3, a new screen appears. In the “Login” section, fill in all the mandatory details like the login name, activate the user by ticking “Active,” and set a new password with options like “Password never expires” or “Required password change.” Move to the “Information” section to pick a title, and enter the user’s name, last name, and email.

For a personal touch, you can add a photo by selecting a file. In the “Administration” section, choose groups like “Super Administration” for user customization. Specify login endpoints like “SEED” and optionally add Oauth2 login and Oauth2 servers. Check user roles and permissions in the “Explorer” tab. In the “Custom Locales” tab, add the language code (e.g., “en-GB”) for preferences; the system fills in date and time formats automatically. Save the setup, log out, and test the new user login by entering the username and password, gaining access to Sage X3.

Here are the step-by-step instructions for creating a new user login in Sage X3:

  • Go to All -> Administration -> Administration -> Users.
  • Click on the “Actions” button and then select “New User.”

Step 1: Navigate to User Creation
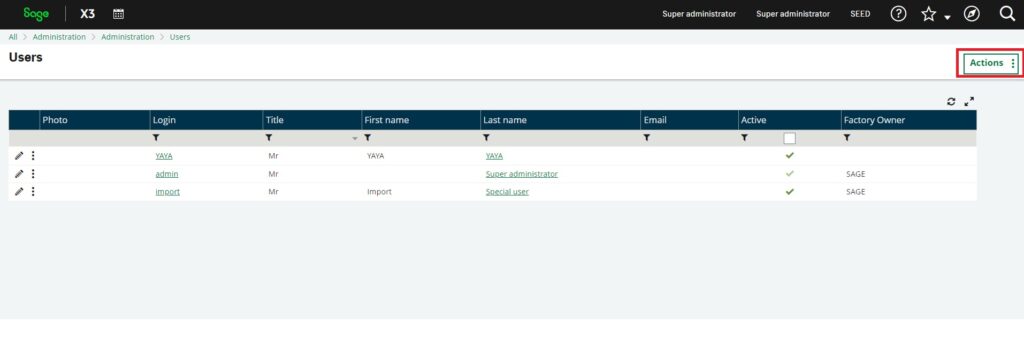
Fig1: Users–Action

Step 2: Access New User Interface

  • After selecting “New User,” a new interface will appear, as displayed in the provided image.

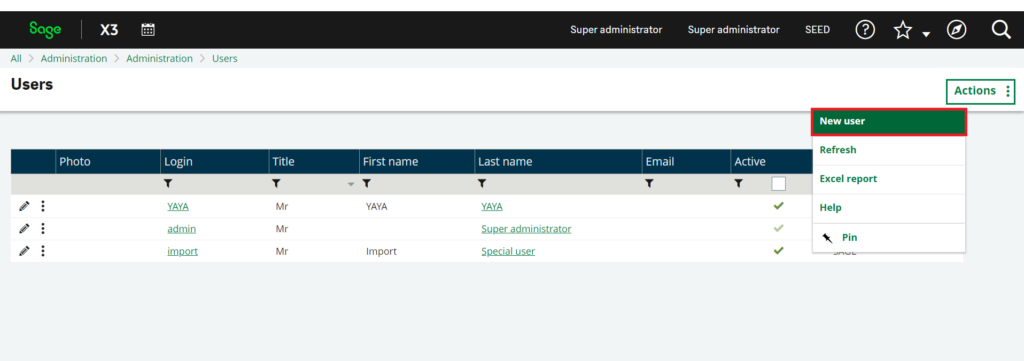
Fig 2: Users—New User

Step 3: Login Tab Details

  • In the “Login” tab, enter mandatory information.
  • Specify the login name and activate the user by checking the “Active” checkbox.
  • Set a new password and configure options like “Password never expires” or “Required password change.”
  • In the “Information” tab, select the desired title (e.g., “Mr/Mrs”), and enter the user’s name, last name, and email.

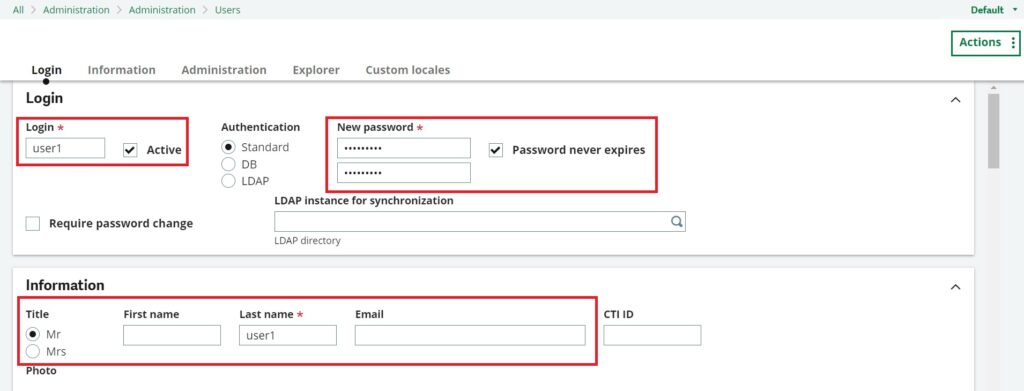
Fig 3: Administrator–login

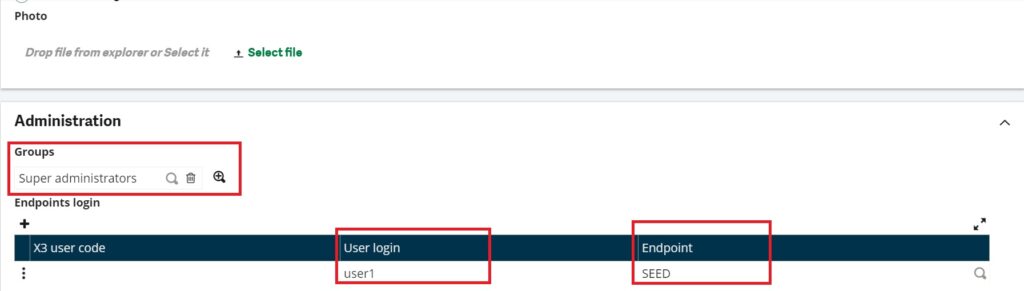
Fig 4.1: Administrator

Step 4: Additional Settings

  • Optionally, add a photo by selecting a file.
  • In the “Administration” tab, choose groups like “Super Administration” for user customization.
  • Add endpoints for login, specifying the desired login (e.g., “user1”) and endpoints (e.g., “SEED”).
  • Optionally, include Oauth2 login and Oauth2 servers.

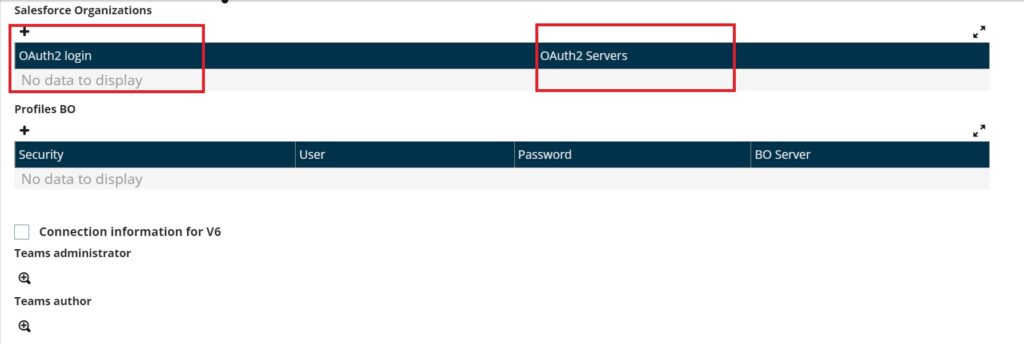
Fig 4.2: Administrator

Step 5: Explorer Tab and Custom Locales

  • In the “Explorer” tab, review assigned user roles and permissions.
  • In the “Custom Locales” tab, add the defined locale code (e.g., “en-GB”) for language preferences.
  • The system will automatically populate details like date format and time format.
  • Save the configuration, log out, and test the new user login by entering the specified username and password, granting access to Sage X3. Refer below image ”fig.5 and fig.6”.
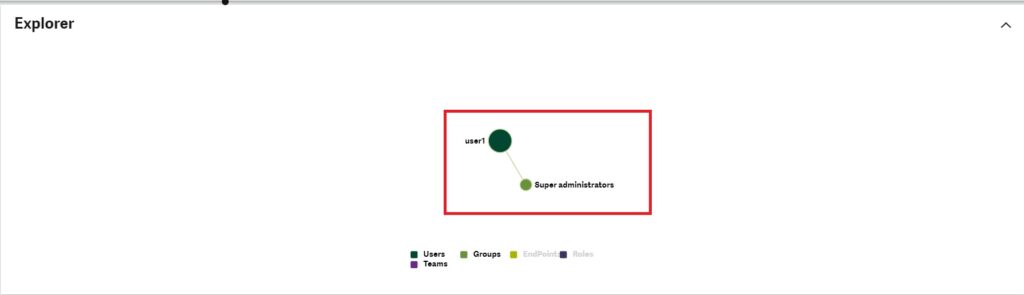
Fig 5: Explorer

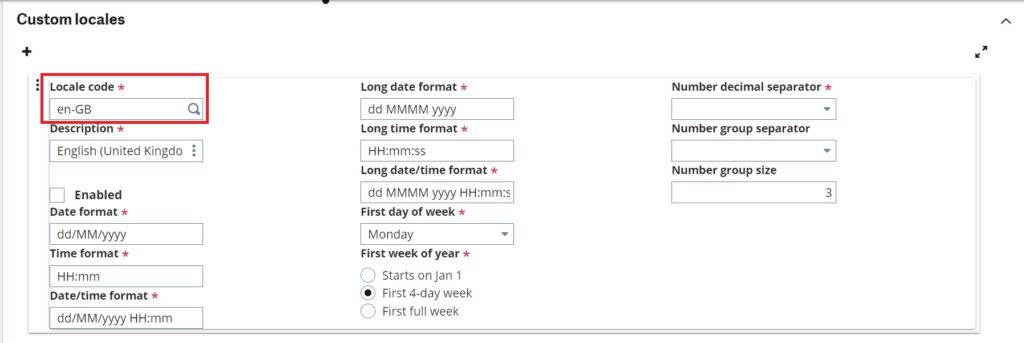
Fig 6: Custom locales

Sage X3 makes it easy for administrators to add new users to the system. It’s simple yet powerful, allowing customization for roles and permissions. This helps users navigate and use Sage X3 efficiently. The step-by-step instructions ensure a smooth setup, making it secure and giving users confidence when logging in to Sage.

Category: Sage ERP X3 Greytrix Integration Sage X3 Sage X3 Consulting standard Technical Tags: Administration module, Administration settings, Custom Locales, Endpoints, Information section, Login details, New User, Oauth2 login, Oauth2 servers, Password settings, personalization, Photo upload, Sage X3 Blogs, Sage X3 Functional Blog, Sage X3 Technical blog, Super Administration, User login, User roles, Users section
Post navigation
← Time management and Inquiry Screen (Load and Capacity) Sage X3 Workflow Auditing Streamlining Transparency Across Operations →
traceability management erp webinar

Greytrix Website and Blogs

  • Greytrix
  • Greytrix Africa
  • Sage 100 & 500 ERP Tips and Tricks
  • Sage 300 – Tips, Tricks and Components
  • Sage CRM – Tips, Tricks and Components
  • Salesforce.com Tips and Tricks by Greytrix
  • Sage Intacct – Tips, Tricks and Components
sage crm and sage x3 integration

Categories

  • Configuration
  • Debug
  • FAQ
  • Features
  • Installation
  • Integration
  • Sage X3 Consulting
  • Tips

Archives

Awards

Premier Partner of the Year Premier Partner of the Year
Platinum Partner of the Year Platinum Partner of the Year
The CEO Story The CEO Story
Gold Partner pf the Year Gold Partner pf the Year
Top Excellence Distributor Top Excellence Distributor
  • na.sales@greytrix.com
  • +1 888 221 6661
  • B301, 3rd Floor, Everest Nivara Infotech Park, MIDC, Turbhe,
    Navi Mumbai 400 705. India

Our Global Locations >>

Who We Are

  • About Us
  • Factor - D
  • Our Network
  • Accolades
  • Career
  •  
  •  

Services

  • Consultation & Implementation
  • Migration
  • Development

Solutions

  • GUMUTM Integration
  • BPortaly
  • Sales Commission
  • Shipping
  • IOT
  •  
  •  

ERP

  • Acumatica
  • Sage Intacct
  • Sage X3
  • Sage 300
  • Sage 100
  • Sage 500

CRM

  • Salesforce
  • D365 CRM
  • Sage CRM
  • Creatio
  •  
  •  
  •  

Other Solutions

  • E-commerce
  • EDI
  • POS

Resources

  • Case Study
  • Blogs
  • Videos
  • E-books
  • News
  •  
  •  

Connect

  • Contact Us
  • Privacy Policy
  • Terms Of Use
  •  

© 2025. Greytrix, All Rights Reserved