
Creating a Crystal Report isn’t just about displaying the correct data—it’s also about presenting that data in a clean, organized, and professional manner. A report with awkward page breaks or large blank spaces can be difficult to read, even if the data is accurate.
While working with Crystal Reports, developers often face two common layout issues:
• Objects such as Terms & Conditions, images, or long text fields are split across pages.
• Sub-reports leave unnecessary blank space when they contain no data.
Fortunately, Crystal Reports provides two simple yet powerful features to solve these problems:
- Keep Object Together
- Suppress Blank Sub-report
In this blog, we’ll explore both features, understand when to use them, and see real-world examples that are especially useful for Sage X3 report developers.
- Keep Object Together
Keep Object Together is an object-level formatting option that prevents a single object from being split across multiple pages.
It can be applied to:
• Text Objects
• Formula Fields
• Database Fields
• Sub-reports
If there isn’t enough space to print the entire object on the current page, Crystal Reports automatically moves the object to the next page.
Example: Using Keep Object Together in a Sales Invoice Report
Let’s take the example of the Terms & Conditions section in a Sales Invoice report.
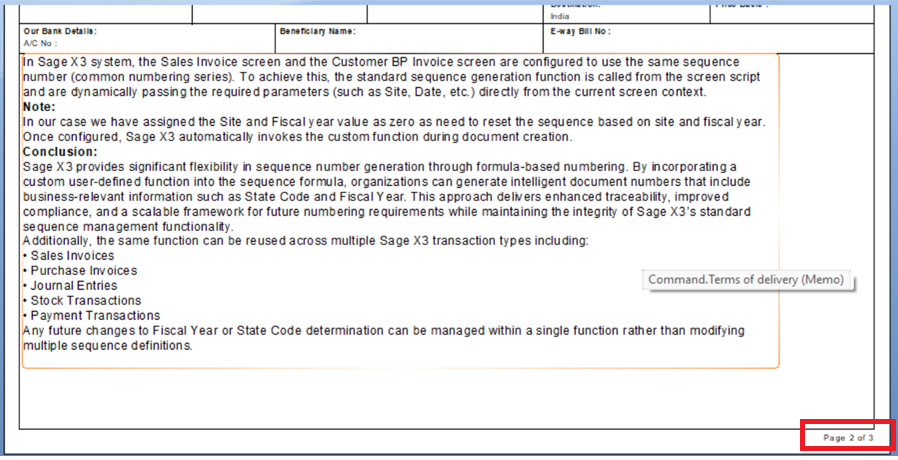
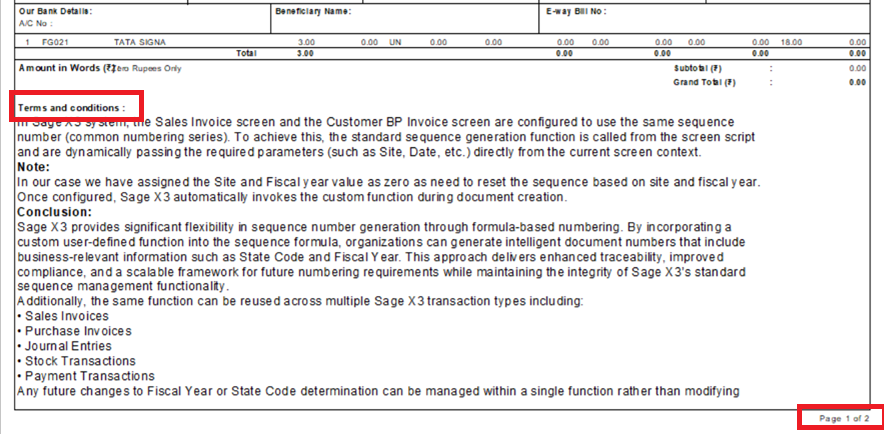
In this scenario, the client wanted the Terms & Conditions to be printed immediately after the invoice details, without leaving any unnecessary blank space. However, by default, Crystal Reports enables the Keep Object Together option for database fields and text objects.
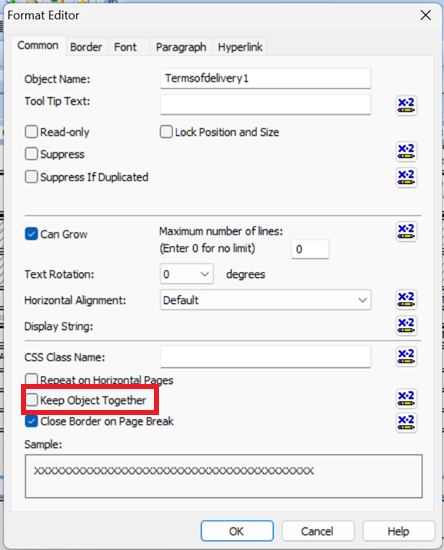
In our case, the client preferred continuous printing rather than leaving unused space at the bottom of the page. To achieve this, we disabled the Keep Object Together option. This allowed the Terms & Conditions to continue from the available space on the current page and flow onto the next page if required, making better use of the page layout.
This example demonstrates that the Keep Object Together option can be useful in different situations depending on the business requirement. If you want an entire object to remain on a single page, keep the option enabled. If your priority is to utilize the available page space and allow the content to continue across pages, simply disable the option. Please refer to the screenshots below for a better understanding.
New Stuff: Sage X3 Integrations Guide: Benefits, Services & Third-Party Integrations
- Suppress Blank Subreport
Subreports are commonly used to display optional information such as:
• Line Level Details
• Serial Numbers
• Tax Details
• Remarks
• Payment Information
• Additional Charges
Sometimes, the subreport doesn’t return any records.
By default, Crystal Reports still reserves space for that subreport, resulting in an unwanted blank area. The Suppress Blank Subreport option automatically hides the subreport when it contains no data.
Example: Using Suppress Blank Subreport in a Sales Invoice Report
Let’s take the example of a Sales Invoice report in which a subreport has been added to display Invoicing Elements.
In this scenario, the Sales Invoice does not contain any Invoicing Elements. However, when the report is printed, Crystal Reports still reserves space for the subreport, resulting in an unnecessary blank area in the report. Please refer to the screenshots below for a better understanding.
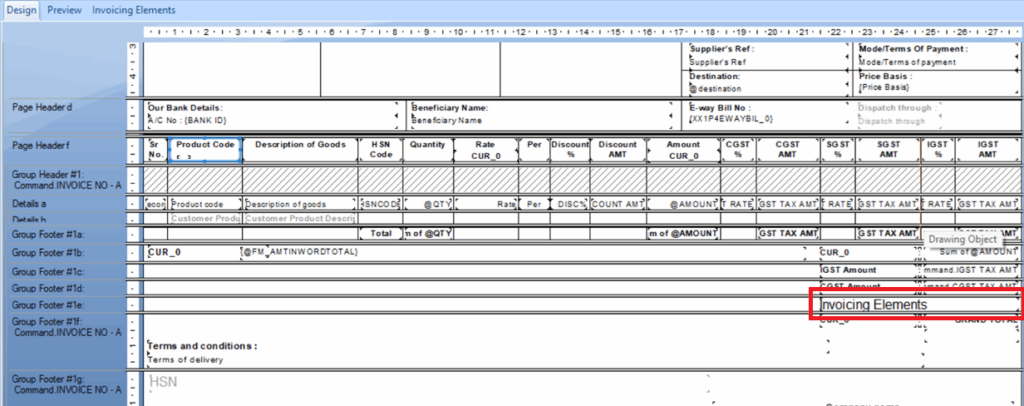
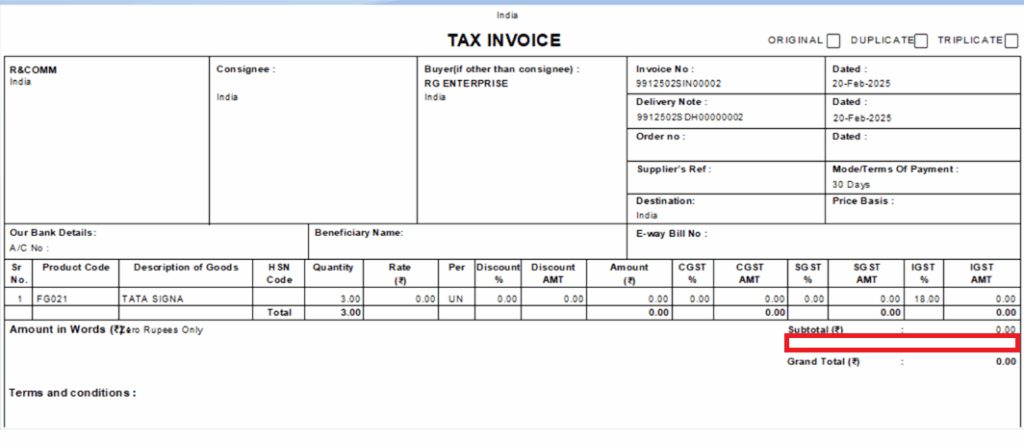
To eliminate this blank space, Crystal Reports provides the Suppress Blank Subreport option.
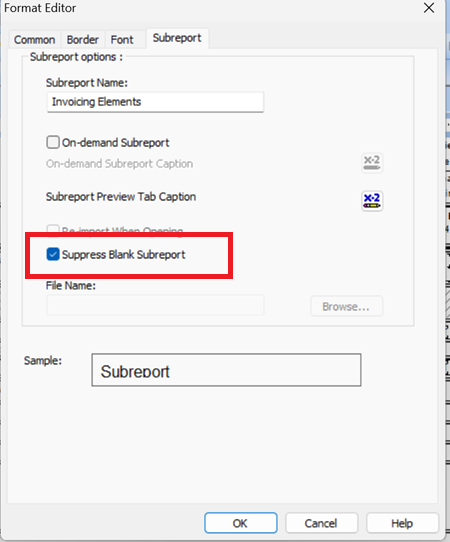
Follow these steps:
- Right-click on the subreport.
- Select Format Subreport.
- Open the Subreport tab.
- Enable the Suppress Blank Subreport option.
- Click OK, save the report, and print it again.
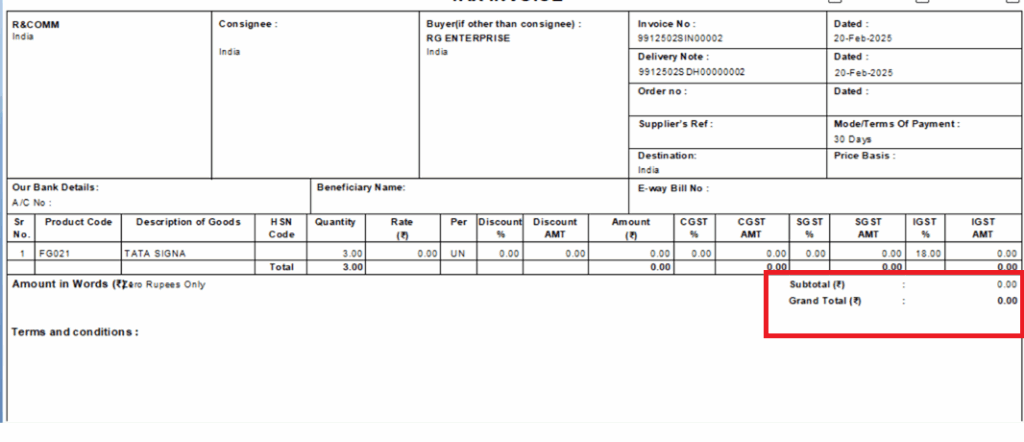
By using Keep Object Together, you can ensure that important elements such as logos, signatures, and Terms & Conditions remain intact on a single page. Similarly, Suppress Blank Sub-report helps eliminate empty spaces by hiding sub-reports that contain no data. When combined with Suppress Blank Section, these features create cleaner and more polished reports.
Whether you’re developing reports for Sage X3, invoices, purchase orders, quotations, or delivery notes, mastering these layout settings will help you deliver reports that not only contain accurate information but also provide a better experience for end users.