There can be possible scenario in an industry where the Products undergoes Quality Check once the Purchase Receipt is created.
There is a setup explained below which will decide if Quality check is required or not.
Steps Involved- Common data >Products > Product Categories
- Select the Product Category for which you would like to enable Quality check
- Click on the Receipts tab
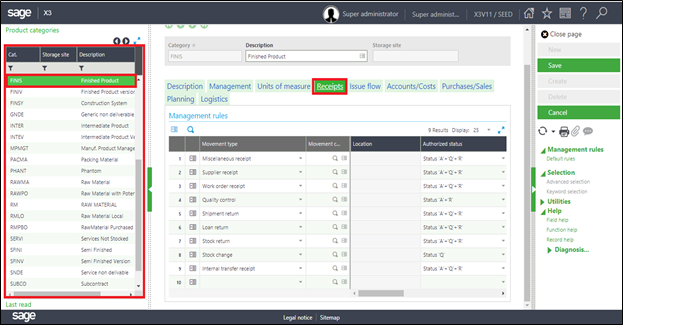
- From the Movement Type column drop down select the transaction name as-
- Miscellaneous Receipt
- Supplier Receipt
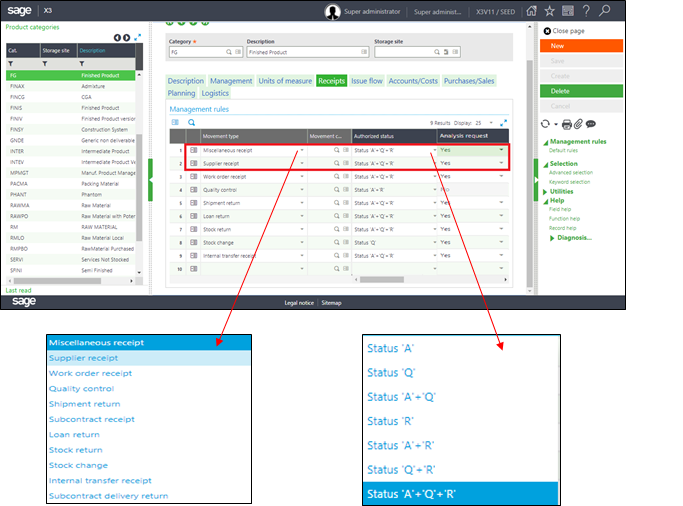
- From the Authorized Status column select the desired status from the dropdown. Where ‘A’ stands for Accepted, ‘Q’ for Quality Control and ‘R’ for Rejected. Besides ‘A+R’, ‘A+Q+R’, etc. denotes the combination of different status.
- The status selected in Default Status column will be auto-fetched in Purchase Receipts transaction respectively.
- In the Analysis Request column select either of Yes/No, to enable generation of Analysis request after any of the Receipt transaction.
With these above steps, Quality check will be enabled once any Purchase Receipt or Miscellaneous Receipt transaction is created for the desired Product category and Authorized Status set as “Q”.