In Sage X3, reports play an important role for representing transactions and records for analysis and growth perspective. Reports can be printed by navigating to the reports module as well as it can be printed via writing script file using 4GL code in sage X3.
Sometimes there might be a requirement if the end user wants to print a report directly clicking on the customized menu item and not by going to the reports module and searching for the report code which needs to be printed.
If we try to open the window of the standard printing screen of reports using 4GL script file, the screen will get opened but still it will not allow the end user to pass the parameters nor print the report. So to solve this, what can we do is create a function which will be called after clicking on the menu item and directly open the printing screen with the desired report code and will also allow to pass the parameters and print the report like the standard report printing works.
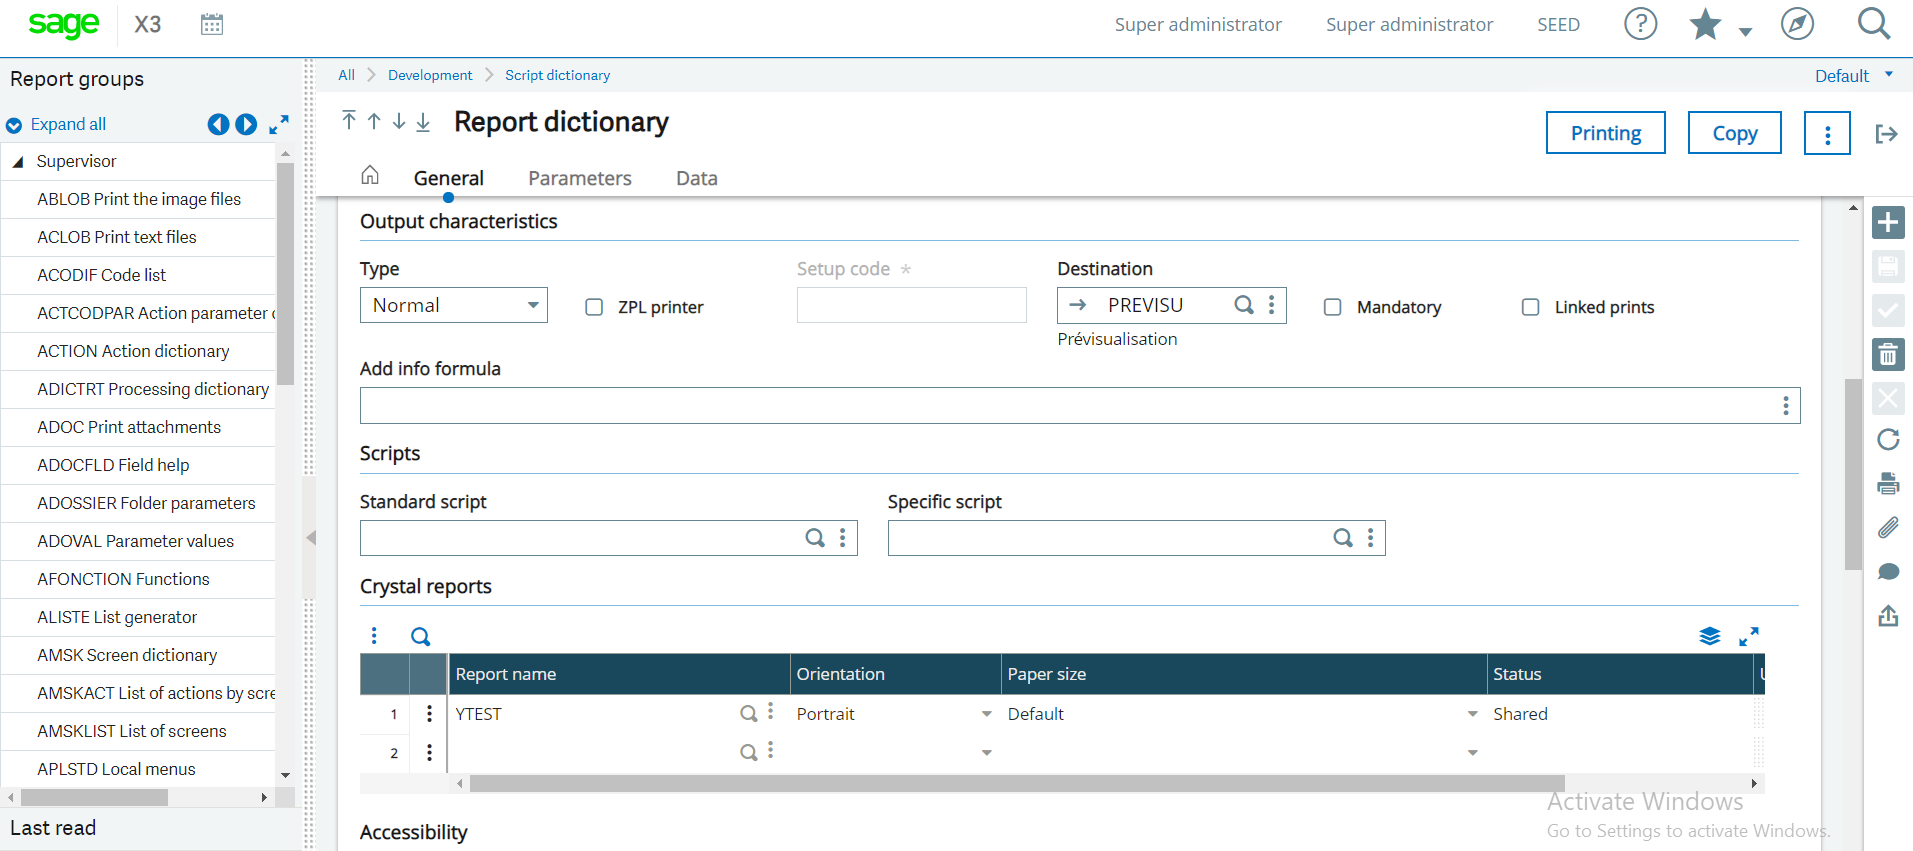
Consider a test report named as “YTEST” be the desired report which end user wants to open the printing screen on clicking of menu item. Navigate to All -> Development -> Script dictionary -> Reports and can create a report as shown in below figures.
Now, let’s create the function for the menu item.
Navigate to: All -> Development -> Script dictionary -> Functions
and click on Functions.
Create a function with function code “YTEST” and select parent menu as “MMIP” and select function type as “Process” as shown in below figure.
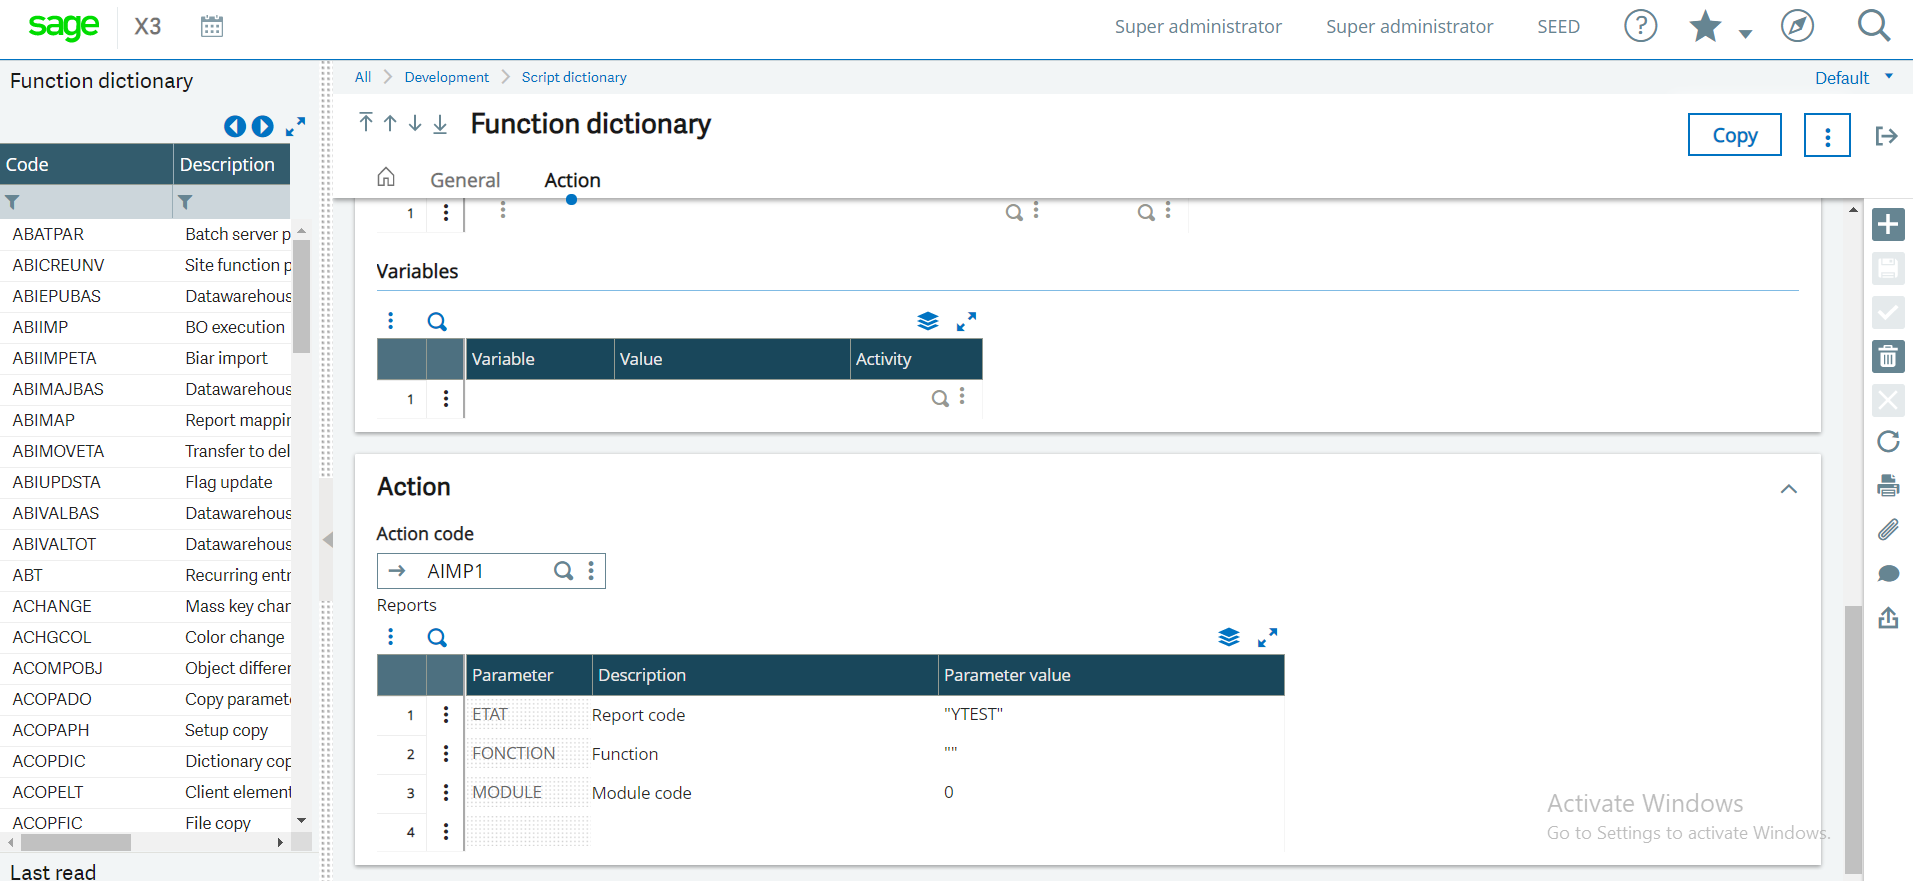
In the Action block of function screen select action code as “AIMP1”. After entering the action code, parameters grid will get enabled and in first line “ETAT” parameter is used for report code in which we will enter desired report code in double quotes the end user wants to be printed. Here, it is “YTEST”. No need to add function code and pass empty double quotes in second line of parameter grid named as “FONCTION” and set module code as 0 as shown in below figure.
Navigate to All -> Administration -> Authoring -> Pages and create a menu item as shown in below figure. Here, menu item code is “YTEST”, endpoint selected is “SEED” and function already created, that is “YTEST”.
After creating menu item, navigate to All ->Administration -> Navigation Pages and add it to the desired module and once clicked on menu item, the printing screen for report code passed in parameter of function will get displayed as shown in below figure.
After clicking on the print button, the report will get printed as we print by the standard process of reports module.
Thus, any desired report can be printed on click of menu item by following the above steps.
This blog helps us to print any report of desired report code on click of a customized menu item.
About Us
Greytrix – a globally recognized and one of the oldest Sage Development Partners is a one-stop solution provider for Sage ERP and Sage CRM organizational needs. Being acknowledged and rewarded for multi-man years of experience and expertise, we bring complete end-to-end assistance for your technical consultations, product customizations, data migration, system integrations, third-party add-on development, and implementation competence.
Greytrix has some unique integration solutions developed for Sage CRM with Sage ERPs namely Sage X3, Sage Intacct, Sage 100, Sage 500, and Sage 300. We also offer best-in-class Sage ERP and Sage CRM customization and development services to Business Partners, End Users, and Sage PSG worldwide. Greytrix helps in the migration of Sage CRM from Salesforce | ACT! | SalesLogix | Goldmine | Sugar CRM | Maximizer. Our Sage CRM Product Suite includes addons like Greytrix Business Manager, Sage CRM Project Manager, Sage CRM Resource Planner, Sage CRM Contract Manager, Sage CRM Event Manager, Sage CRM Budget Planner, Gmail Integration, Sage CRM Mobile Service Signature, Sage CRM CTI Framework.
Greytrix is a recognized Sage Champion Partner for GUMU™ Sage X3 – Sage CRM integration listed on Sage Marketplace and Sage CRM – Sage Intacct integration listed on Sage Intacct Marketplace. The GUMU™ Cloud framework by Greytrix forms the backbone of cloud integrations that are managed in real-time for the processing and execution of application programs at the click of a button.
For more information on our integration solutions, please contact us at sage@greytrix.com. We will be glad to assist you.