In Sage X3, one of the client’s requirements was to get a few custom reports to be enabled in the Sales & Purchase module Automatic generation screens. For this we need to enable some options and alter settings in Sage X3 reports dictionary.
New Stuff: Sales Invoice creation based on Delivery Type in Sage X3
We’ll be referencing the following screens from Sage X3 for this:
Report Dictionary: All > Development > Script Dictionary > Reports Dictionary (GESARP)
Destinations: All > Parameters > Destinations > Destinations (GESAIM)
Automatic Delivery Generation: All > Sales > Deliveries > Order delivery generation (FUNAUTDLV)
Refer the screenshots for reference:
Note: Below process is shown for Automatic Delivery Generation screen of Sales module but this is valid for similar screens from various modules of SageX3.
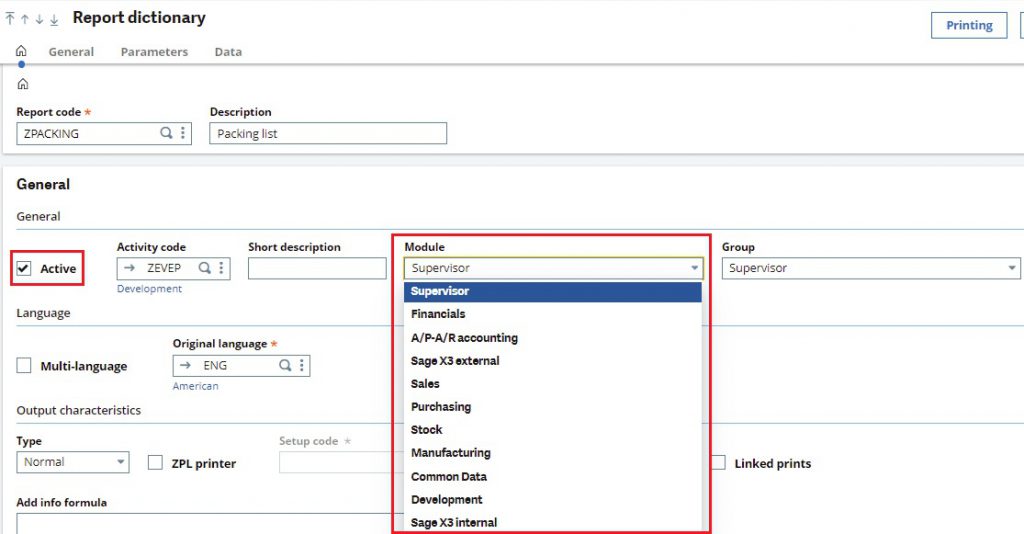
Step 1: To start with, navigate over to the Report Dictionary and search for the specific Custom/Standard Sage X3 report. Here we can find several options and settings to set up the report. We are only concerned for Active status & Module (drop-down menu), we need to make sure the report code is Active & module is selected to our respective module i.e., Sales as shown below:

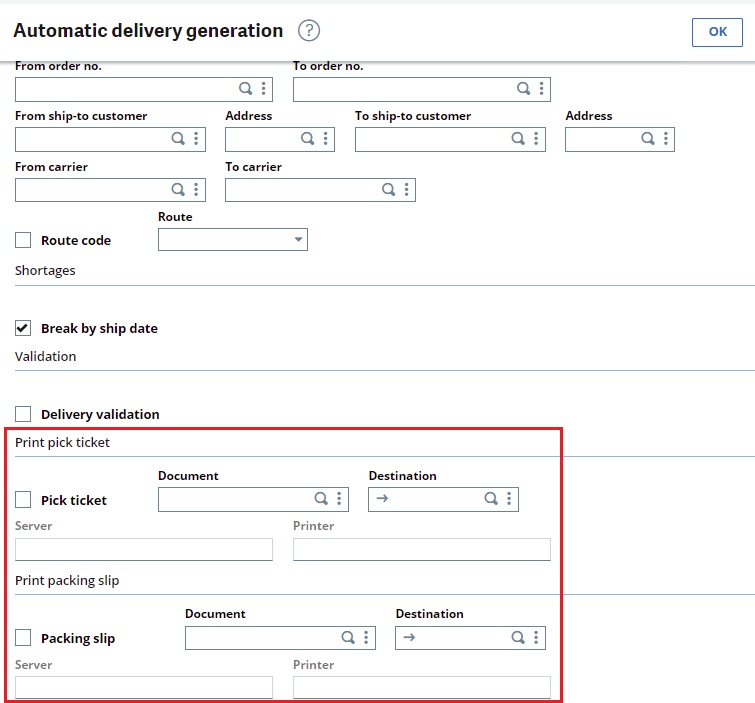
Step 2: After this next part which is equally important is setting up the Destination for the report. For the requirement of report to get fetched from Automatic Delivery Generation screen we can see there is Destination field next to Document as shown below:

Step 3: From above on selection of the checkboxes their respective Document & Destination fields gets active. Now if we click the Document selector we’ll be able to find our report in the menu (as shown below in Fig 3) and then we need to select the Destination:

Note:
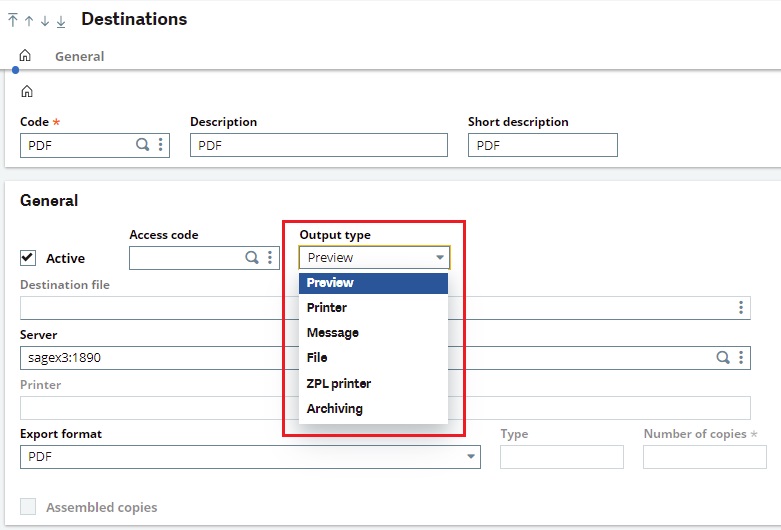
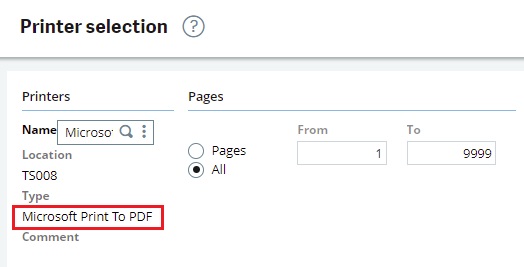
Here Destination code must have an Output type as Printer if not then jump to Destinations and change the same to Printer (as shown in Fig 4). If we require the output from this Automatic delivery screen to still fetch as a downloadable PDF then we need to further define the below setting (as shown in Fig 5).


After following all the above steps, we’ll be able to get our custom/standard reports printed from such screens.

