In Sage X3, we make sure of import/export templates quite often for importing huge data with ease. However sometimes the importing data templates are acquired through any external client application which might have different external data parameters which in Sage X3 are stored in different internal codes. Sage X3 provides us a Setup module that helps setting these in an efficient way.
For example: MATERIALS are external codes for category while in Sage X3 product category is RM.
To know more about this, we’ll show a small example of how we are transcoding the Internal code with an external code that works both for Importing & exporting cases.
For this we’re referencing following paths and screenshots below:
Imports/Exports template: All > Setup > Usage > Imports/Exports > Import/Export template (GESAOE)
Transcribe Import/Export: All > Setup > Usage > Imports/Exports > Transcribe import/export (GESAOR)
Exports: All > Usage > Imports/Exports > Exports (GEXPOBJ)
Imports: All > Usage > Imports/Exports > Imports (GIMPOBJ)
Products: All > Common Data > Products > Product (GESITM)
New Stuff: How to determine where the data type is used in Sage X3
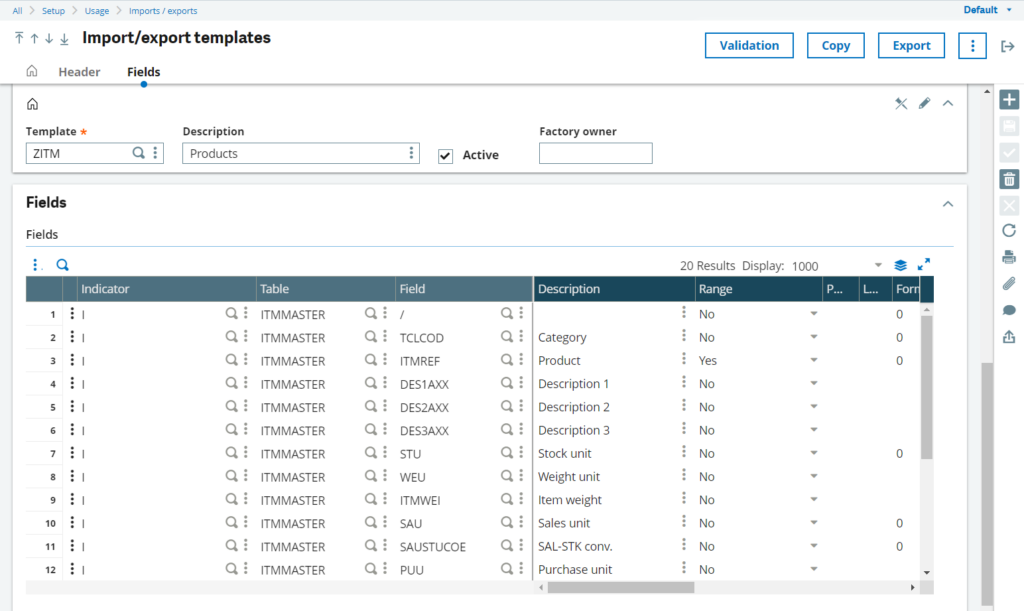
-As shown in Fig. 1 we have our custom product template on which we’ll showcase the part for Category field.

-When we try to export the data from the above template we get the data as shown in Fig. 2 where we can see the Category as BRR.
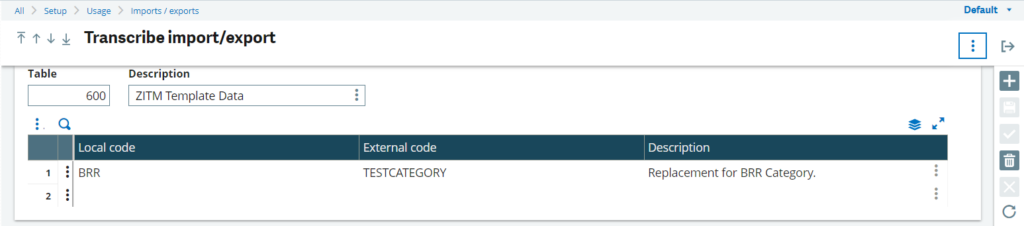
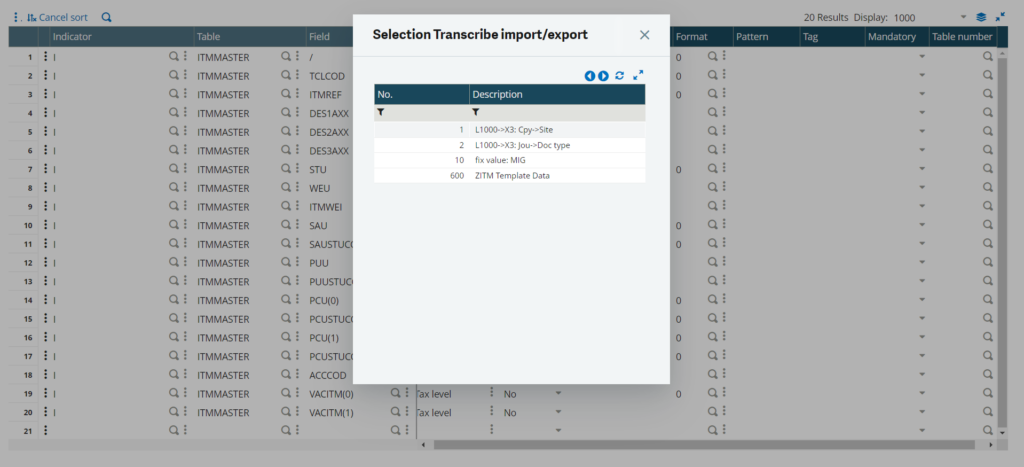
-Now to transform the category data we’ll set up a new Transcribe import/export table as shown in Fig. 3. In that we’re adding the local code as BRR & external code as TESTCATEGORY. Once the table is created we’re linking the table number to the Category field’s Table number column as shown in Fig. 4.
Note:- By sage standards it is recommended to use table numbers within the range 600-999 as below can be overwritten by application updates.
-For the transcription process the following principles apply:
Exports: A search for the field’s original value is performed on the values in Local code and then transcribed to the value in External code.
Imports: The External code column is searched, and the value is transcribed to the Local code value.
-Other important parts involve while setting up the table data:
– Spaces are not allowed in the Local code and External code values.
– To provide a default in the column being searched, use an “ * ” as the value.
– If the column being searched includes the same value more than once, the first transcription will be used.
– To prevent a specific value from being transcribed, set the transcribed value to “ * ”.

-Now once we export the same product data we can see the category BRR is transformed with TESTCATEGORY as shown in Fig. 5.
-We can test the same scenario by Importing a template with an external code and in sage x3 the creation is handled with the internal code as shown in Fig. 6 & Fig. 7 below.


-As we can see in Fig. 8. Below The product masters of the created product have BRR as the category.

This way we can implement advanced restrictions on transactions using 4GL in Sage X3.
About Us
Greytrix – a globally recognized and one of the oldest Sage Development Partners is a one-stop solution provider for Sage ERP and Sage CRM organizational needs. Being acknowledged and rewarded for multi-man years of experience and expertise, we bring complete end-to-end assistance for your technical consultations, product customizations, data migration, system integrations, third-party add-on development, and implementation competence.
Greytrix has some unique integration solutions developed for Sage CRM with Sage ERPs namely Sage X3, Sage Intacct, Sage 100, Sage 500, and Sage 300. We also offer best-in-class Sage ERP and Sage CRM customization and development services to Business Partners, End Users, and Sage PSG worldwide. Greytrix helps in the migration of Sage CRM from Salesforce | ACT! | SalesLogix | Goldmine | Sugar CRM | Maximizer. Our Sage CRM Product Suite includes addons like Greytrix Business Manager, Sage CRM Project Manager, Sage CRM Resource Planner, Sage CRM Contract Manager, Sage CRM Event Manager, Sage CRM Budget Planner, Gmail Integration, Sage CRM Mobile Service Signature, Sage CRM CTI Framework.
Greytrix is a recognized Sage Champion Partner for GUMU™ Sage X3 – Sage CRM integration listed on Sage Marketplace and Sage CRM – Sage Intacct integration listed on Sage Intacct Marketplace. The GUMU™ Cloud framework by Greytrix forms the backbone of cloud integrations that are managed in real-time for the processing and execution of application programs at the click of a button.
For more information on our integration solutions, please contact us at sage@greytrix.com. We will be glad to assist you.