In Sage X3, Users can create Payments based on Purchase invoices and can see specific data being flowed from invoice screens to the respective payment screens. But what if the user wants specific data to be flowed from Payment to the Journal entry during posting of the payment.
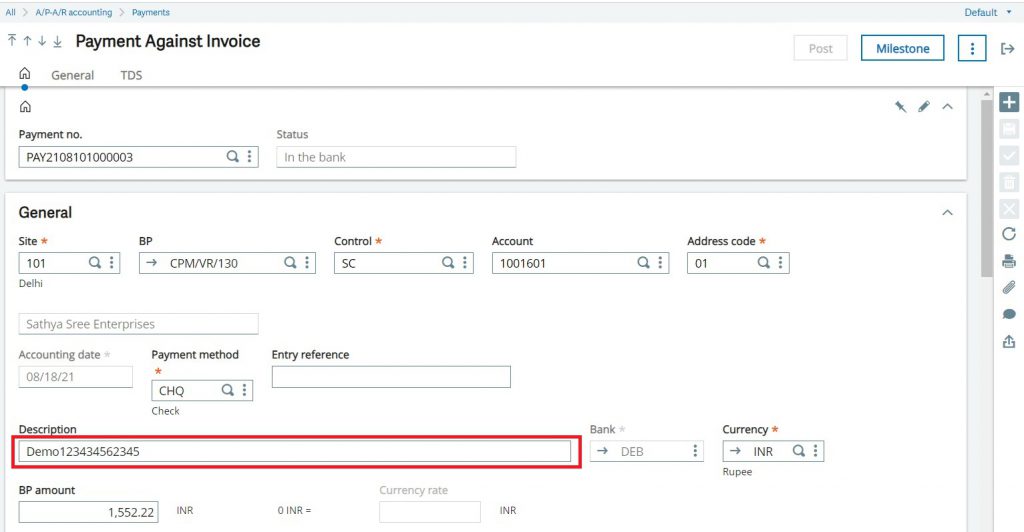
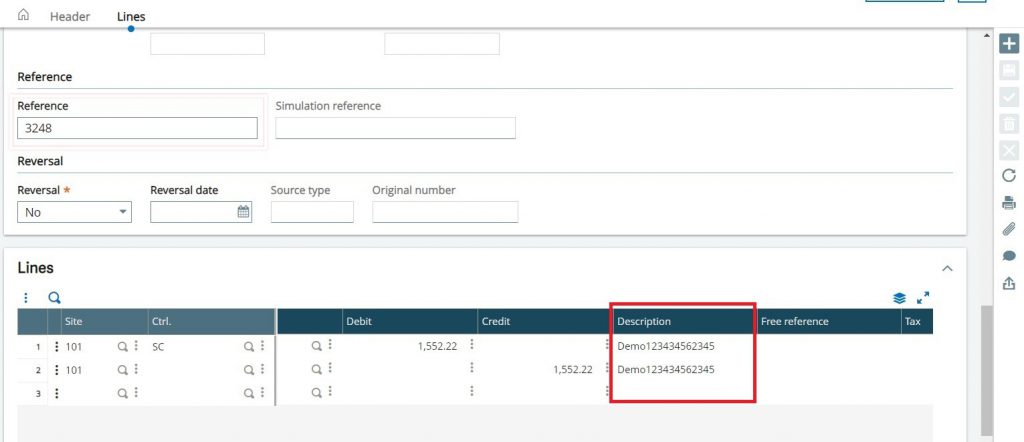
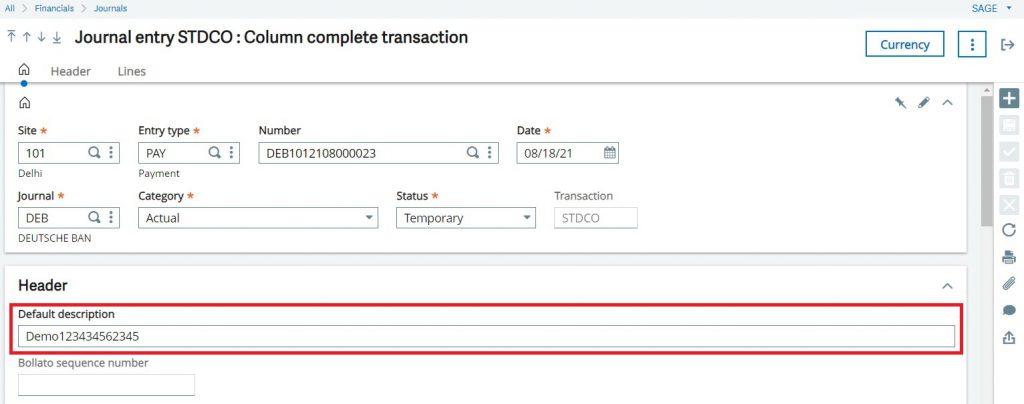
In this blog, we’ll see how to flow the “Description” field present on the General tab of AR/AP Payment screen header to the “Default description” field present on the Header tab of Journal Entry screen as well as the “Description” column present at the lines level on the same screen. All this will be done with the use of Automatic Journals, which creates the Journal data based on Posting of a Payment.
First, to navigate on the following screens below are the steps:
Payment/Receipt screen: All > A/P-A/R accounting > Payment/Receipt entry
Journal Entry: All > Financials > Journal Entry
Automatic Journals: All > Setup > Automatic Journals
For the purpose of making things a bit more clear visually, below are the screenshots fields locations on their respective screens:
New Stuff: How to setup sales targets in Sales Commission Module

Now once we’re familiar with the screens, we’ll first find out the Automatic journal code used for the posted Payment. Follow the below mentioned steps:
Step 1: Check on the respective payment entry whether it’s posted or not. You can do that by checking the POST button (on the right top side on version 12 Sage X3) being enabled or hidden. If it’s hidden the Payment is posted and it’s Journal entry is already created, if not then please post it first.
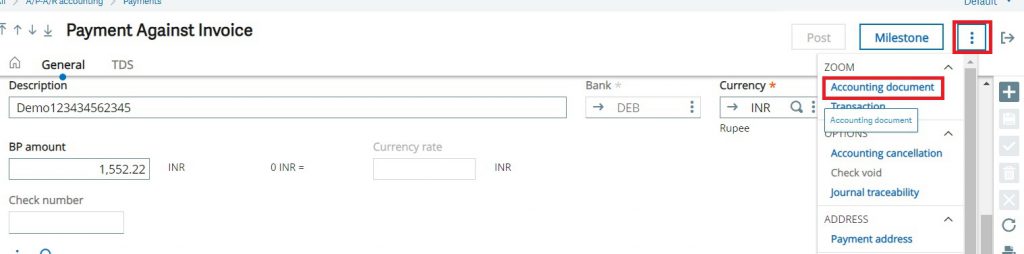
Step 2: Jump onto its respective Journal entry screen via Accounting document button as shown below.
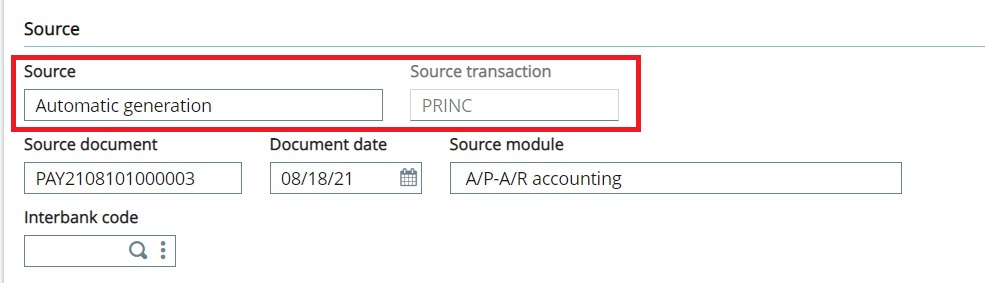
Step 3: Once on the Journal Entry screen, scroll below to find the Source tab in that look for Source field which’ll show “Automatic generation” and next to it will be Source transaction field showing “PRINC”. This is the Automatic Journal code we’re looking for.
Now that we’ve noted the Automatic Journal code, next steps involve us flowing the data.
Step 4: Now in a new tab, open Automatic Journal and on the left-list search for PRINC. Scroll below to the formula section on screen and check below for the Description and Journal Reference fields as shown:
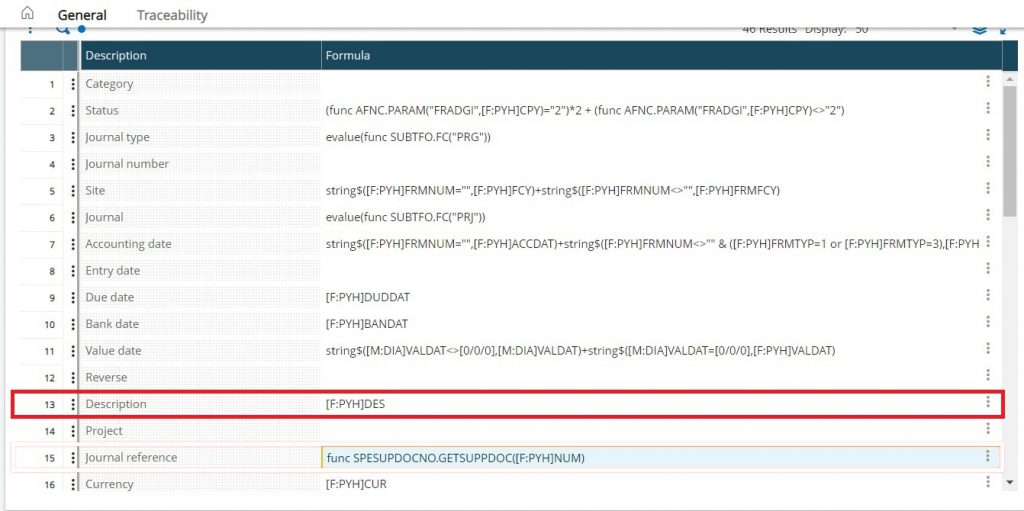
Step 5: The Description field shows from where the data will be flowing to the Default Description field on the Journal Entry screen.
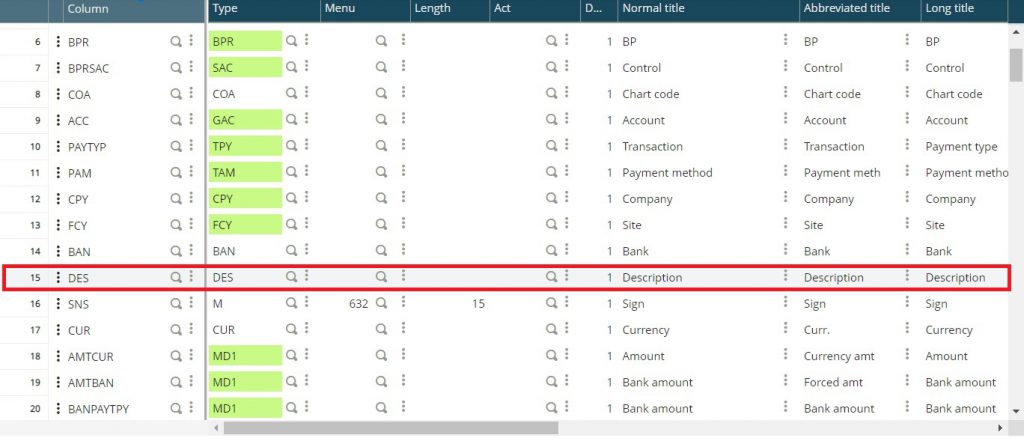
Now we’ve to use Description field data from Payment screen to flow on Default description and Lines description fields on Journal Entry. For this, we need to check where in PAYMENTH table it is storing:
Step 6: So use [F:PYH]DES in the Description field as shown in fig. On Step 4.
Note: Before making any change on the Automatic Journal formula field, keep a backup of the existing value present on the fields in case of mistake.
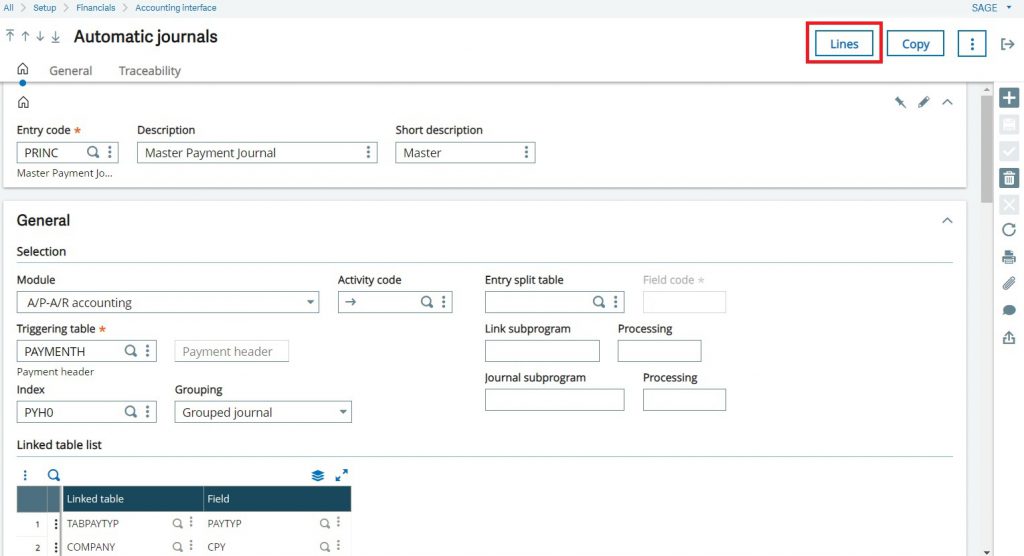
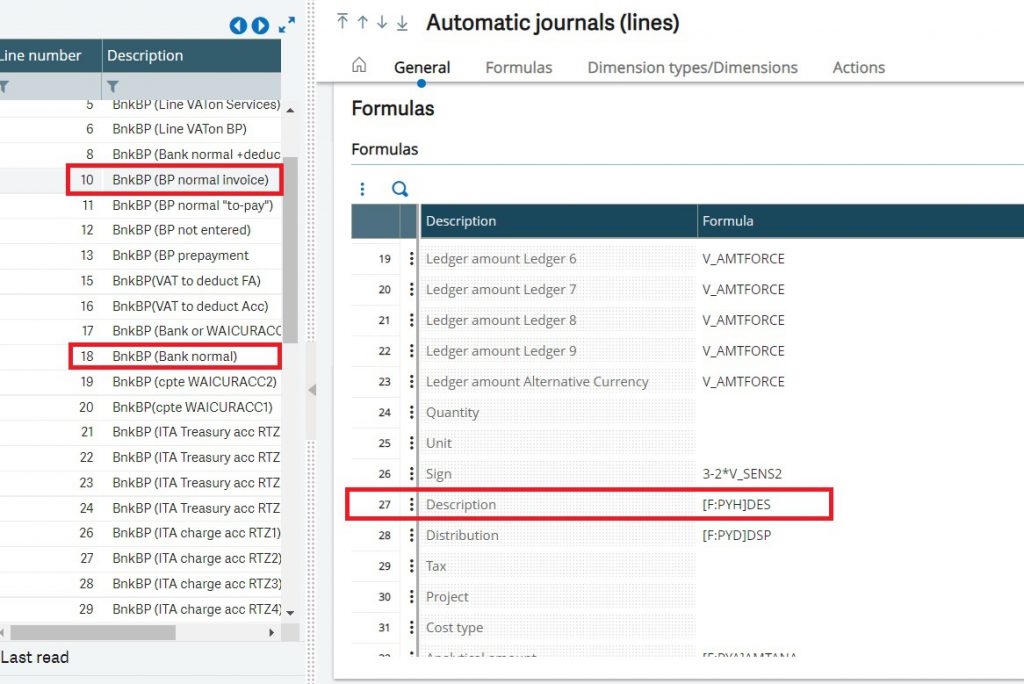
Step 7: Now the data will flow to the Default description field on Journal entry, so to flow the same data on the Lines description as well. Open Lines located on top right on screen as shown:
Step 8: In Lines scroll down to the Formula section and in that look for Description field, here use the same [F:PYH]DES to flow the data. However, if you check on the left-list there are many lines so you need to check which ones will work, for this particular step we used line no. 10 and 18 to make the change.
Step 9: Once the changes are done Save the Automatic Journal and perform a restart of the application, this is necessary to take effect.
Step 10: After restart, open the Payment screen and first cancel the previously posted entry using the Accounting cancellation option below the Accounting document as shown in Step 2. Give some time and then repost the Payment, and jump to the Journal Entry screen to see if the data is flowing properly.


In this way, we can make use of the Automatic Journals module to flow data without making changes in Specific scripts.
About Us
Greytrix – a globally recognized and one of the oldest Sage Development Partners is a one-stop solution provider for Sage ERP and Sage CRM organizational needs. Being acknowledged and rewarded for multi-man years of experience and expertise, we bring complete end-to-end assistance for your technical consultations, product customizations, data migration, system integrations, third-party add-on development, and implementation competence.
Greytrix has some unique integration solutions developed for Sage CRM with Sage ERPs namely Sage X3, Sage Intacct, Sage 100, Sage 500, and Sage 300. We also offer best-in-class Sage ERP and Sage CRM customization and development services to Business Partners, End Users, and Sage PSG worldwide. Greytrix helps in the migration of Sage CRM from Salesforce | ACT! | SalesLogix | Goldmine | Sugar CRM | Maximizer. Our Sage CRM Product Suite includes addons like Greytrix Business Manager, Sage CRM Project Manager, Sage CRM Resource Planner, Sage CRM Contract Manager, Sage CRM Event Manager, Sage CRM Budget Planner, Gmail Integration, Sage CRM Mobile Service Signature, Sage CRM CTI Framework.
Greytrix is a recognized Sage Champion Partner for GUMU™ Sage X3 – Sage CRM integration listed on Sage Marketplace and Sage CRM – Sage Intacct integration listed on Sage Intacct Marketplace. The GUMU™ Cloud framework by Greytrix forms the backbone of cloud integrations that are managed in real-time for the processing and execution of application programs at the click of a button.
For more information on our integration solutions, please contact us at sage@greytrix.com. We will be glad to assist you.