In Sage X3, notifications are typically used to alert users about certain events or actions within the system. These notifications can be configured to appear in various parts of the system, such as the user’s dashboard, or they can be sent via email.Notifications in Sage X3 provide a flexible and configurable way to keep users informed about important events and activities within the system, helping to improve efficiency and responsiveness in managing business processes.
Sage X3 automatically creates and sends notifications in accordance with the configured settings whenever a workflow event takes place. Notifications can be sent by email, shown on the Sage X3 user interface’s dashboard or the main screen, or both.
We’ll guide you through setting up an email notification alert triggered whenever a Sage X3 user deletes a sales order. We’ll establish the context for the email, add a basic condition, and ensure that the email is sent only when a sales order with a value exceeding $1000.00 is deleted. The email will contain details such as the sales order number, its amount, and the user responsible for deleting it.
Key Features:
1.Create the Notification:
Navigate to: Setup -> Workflow -> Notifications
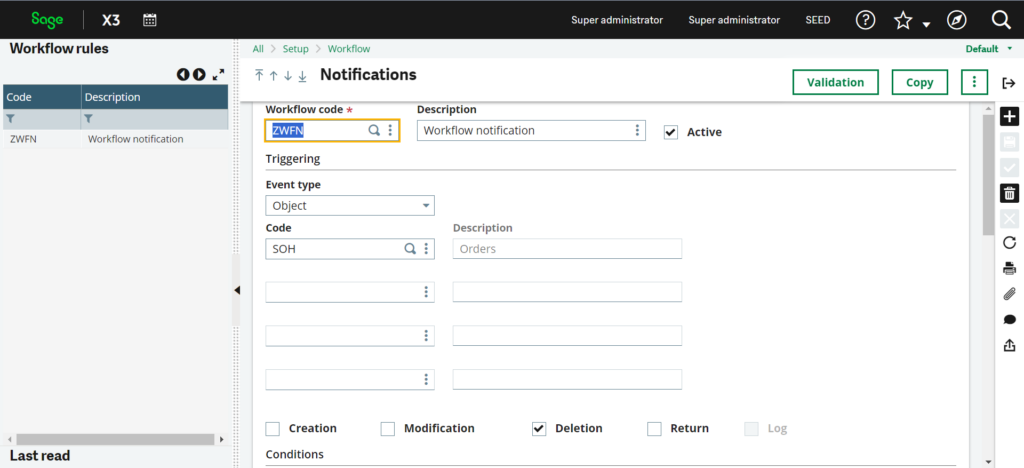
Click on the New button to create a new Notification.Workflow code: ZWFN,description: Workflow notification for sales orders that have been deleted that total more than 1000. Make sure the Active checkbox is checked. Put a checkmark next to the Deletion checkbox and set the Event type to Object and Code to SOH.

Fig. 1 – Create a new Notification
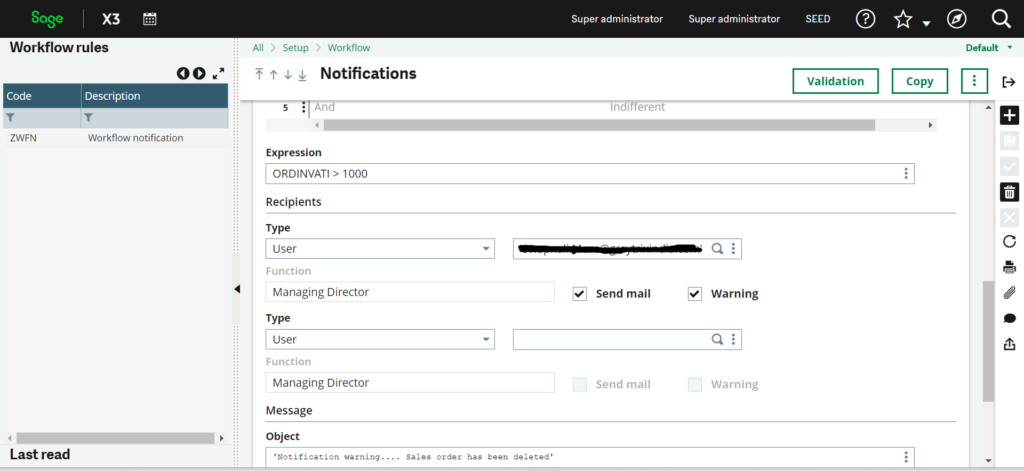
If sales orders greater than $1000.00. In the Expression box, we want to create that condition and to do that you can either enter ORDINVATI > 1000, or click the Action menu for the Expression box and select Formula Wizard. Then expand, Screen SOH4 and locate ORDINVATI and click it and click OK.

Fig. 2 – Create condition
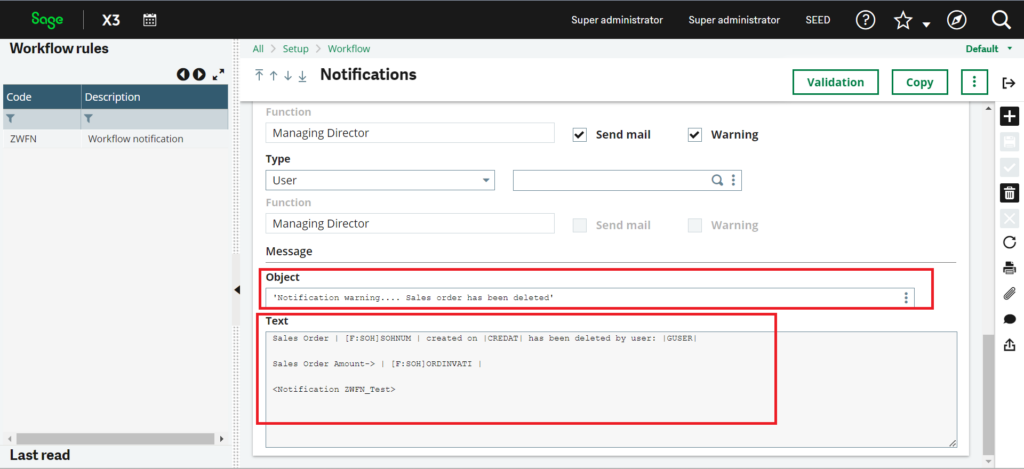
To add a subject and email body context for the email that will be sent to the recipient, scroll down to the Message section.. In the Object area, type the following (in between quotes) ‘Notification warning.. sales order has been deleted’. Then in the Text area, we would like to add the sales order number, sales order create date, user who deleted the sales order, and sales order amount.
Enter the following:
Sales Order | [F:SOH]SOHNUM | created on |CREDAT| has been deleted by user: |GUSER|
Sales Order Amount-> | [F:SOH]ORDINVATI |
<Notification ZWFN_Test>

Fig. 3 – Text for Email Notification
Save the Notification and Validate it.
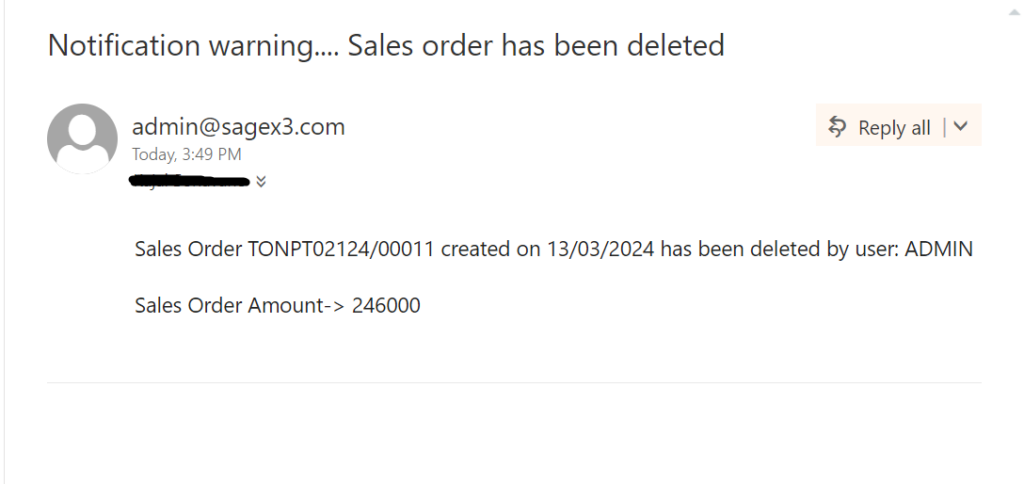
2. Delete the Sales order : Create and save a new sales order in the same folder as the notification. Make sure the sales order total is $1000 or higher!. Delete the sales order and after a few moments, you should see an email that looks like this:

Fig. 4 – Email Notification
Thus we have demonstrated Setting up a notification when an X3 user deletes a sales order involves configuring the system to trigger an email alert based on specific conditions. By establishing the context of the email, adding a condition related to the sales order amount, and including essential details such as the order number and the user who performed the deletion, users can stay informed about critical actions within the Sage X3 system. This setup ensures timely awareness of significant events, allowing for efficient monitoring and management of sales order processes.

