While generating multiple reports in order to compile data across various departments in the organization every time the end user has to enter the date range in the report parameters every time they generate the report which becomes a quiet task and can be error prone too.
Parameter Setup
1. Go to Setup > Users > Users
2. Select the User Code
3. Click on the ‘Parameters’ anchor or tab
4. From the ‘Parameters’ section locate the Chapter = Supervisor and Group = DEF (Default Values)
5. Click the dots or action box and select ‘Detail’
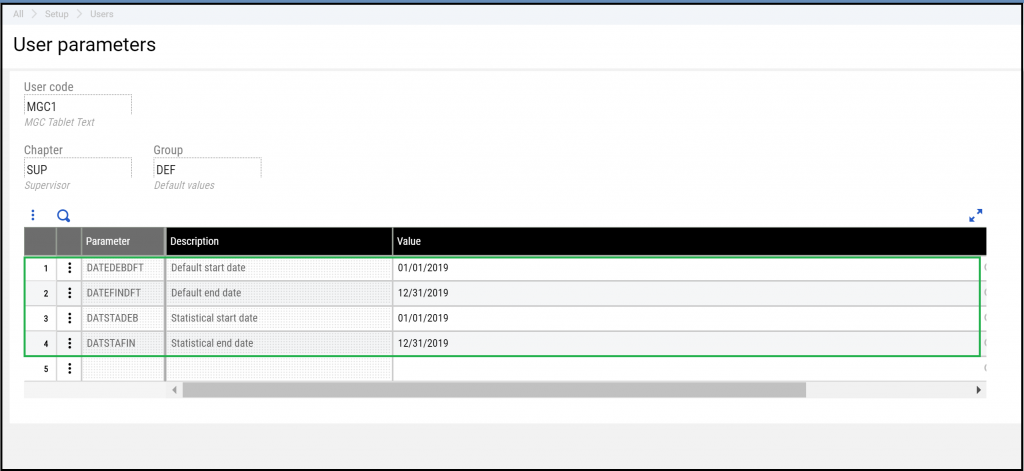
Update the following parameters to the desired start and end dates:
DATEDEBDFT (Default Start Date)
DATEFINDFT (Default End Date)
DATSTADEB (Statistical start date)
DATSTAFIN (Statistical end date)
Click ‘Ok’ when finished and save.
Folder Setup
Go to Setup > General Parameters > Parameter Values
Expand the SUP Chapter and select the appropriate folder
Click on the dots or action box for the DEF Group and select ‘Detail’
Enter the default start and end dates
Click ‘OK’ and save
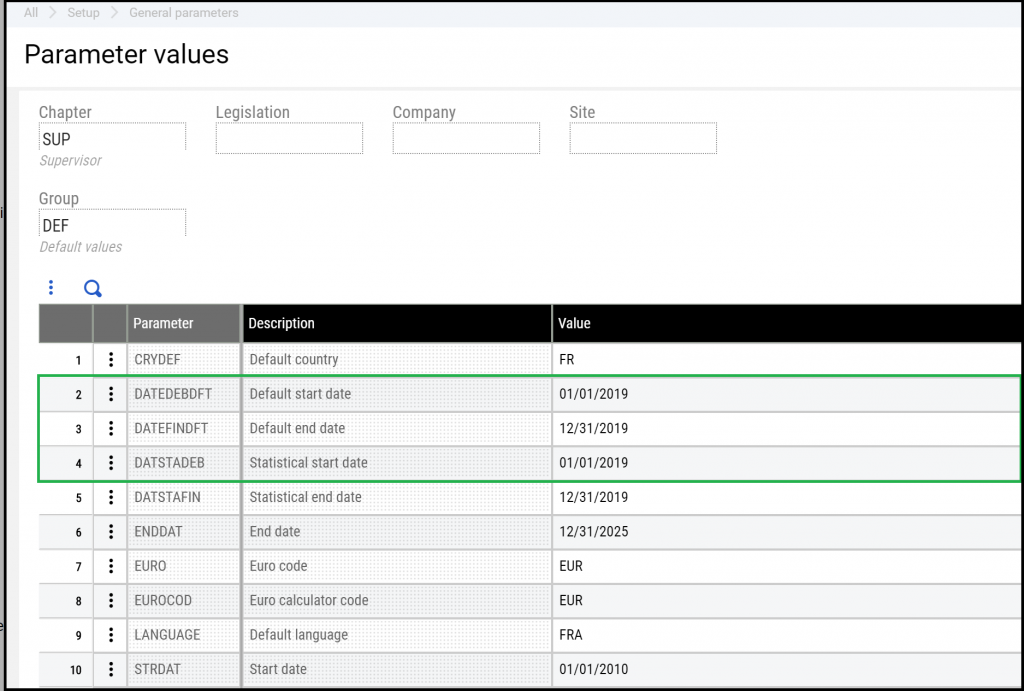
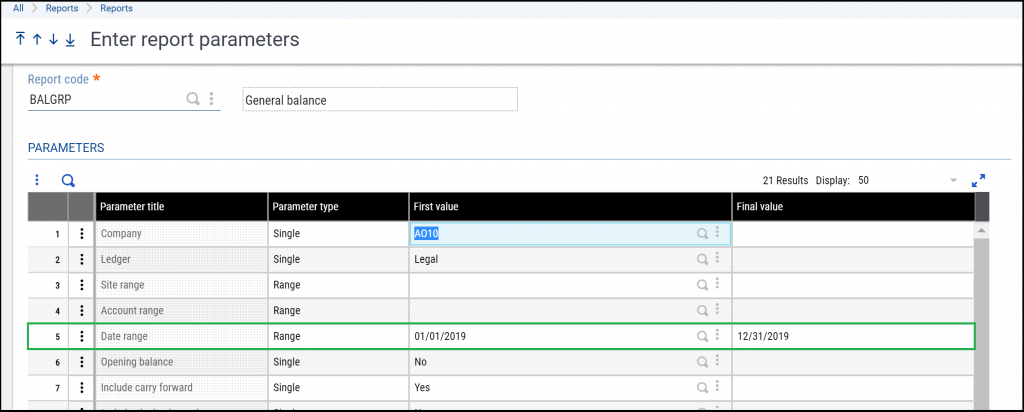
When running a report the default date range will now automatically populate

Thus by following and applying the above stated steps and process the end user shall be able to generate multiple reports and multiple inquiries within the same date range in Sage X3.