In Sage X3, screens play a very important role, and their layouts too. Sometimes, the customer wants a slightly different layout than the standard screens of Sage X3.
One exciting feature of Sage X3 is that it allows the user to change or modify with few possible options for customized screen layout for better user experience. In this blog, we will show you how we can change screen layouts in Sage X3 V12.
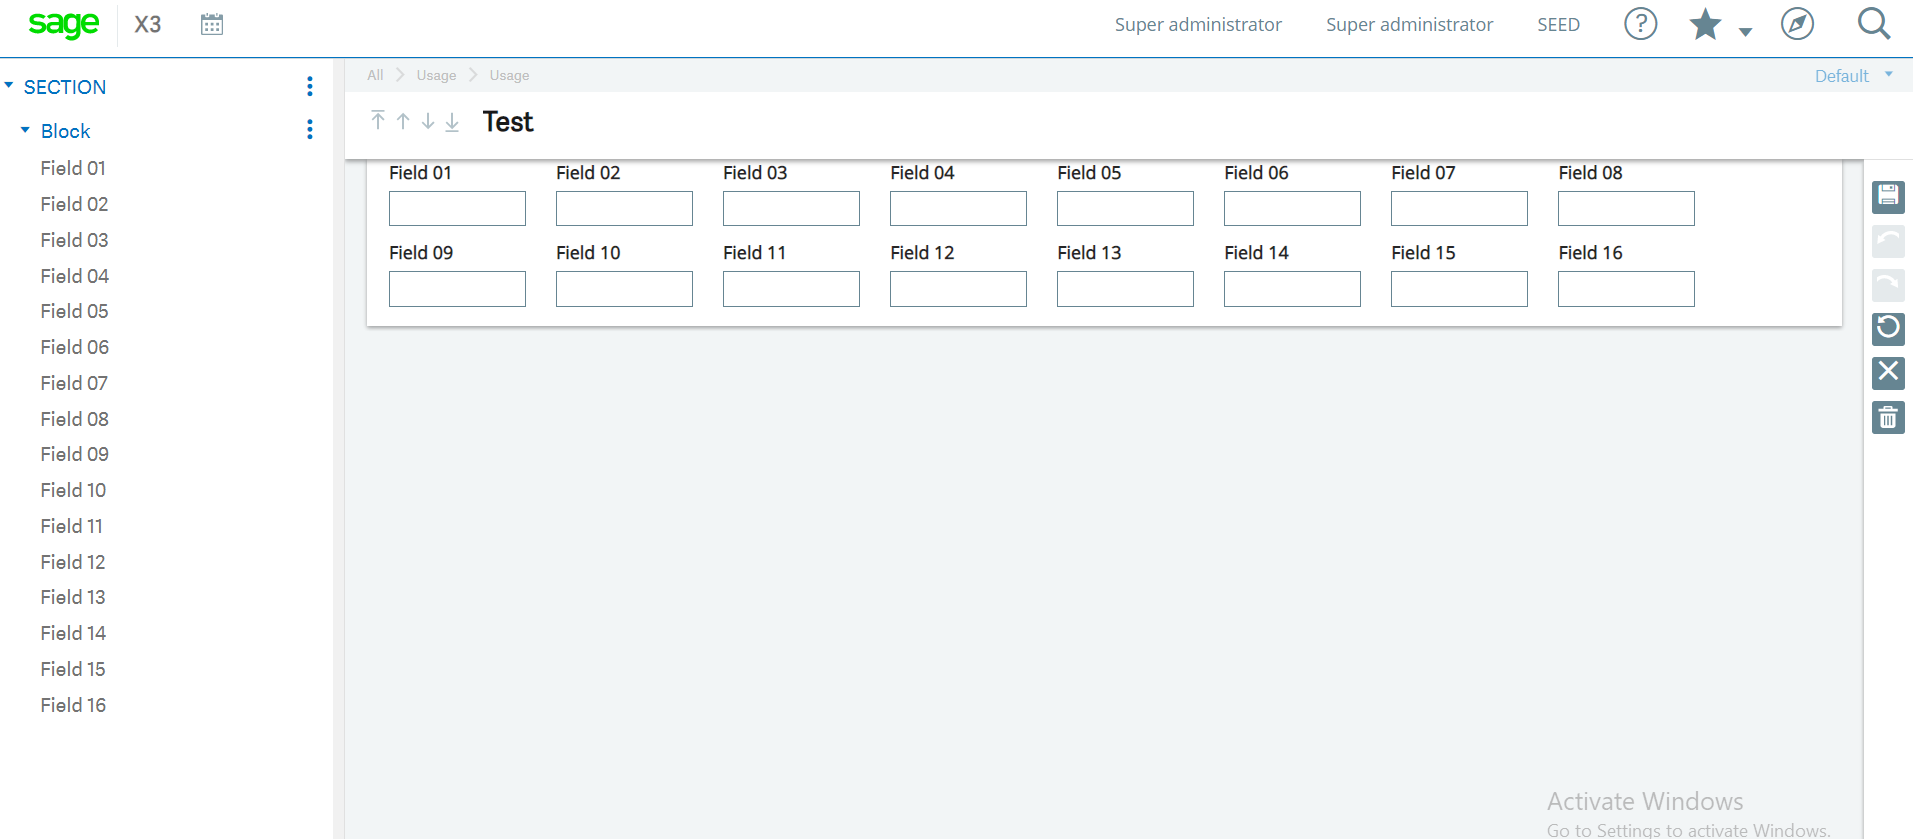
Consider a test screen consisting of a few fields as shown below figure.
As we can see in the above figure, the fields are not aligned properly. For moving the field to the next line there is the option of “break after” in the screen where by selecting yes, the field can be moved to the next line.
Navigate to All – > Development -> Script Dictionary -> Screens
Go to fields and select yes after which field you want the other fields should come in the next line as shown in the below figure.
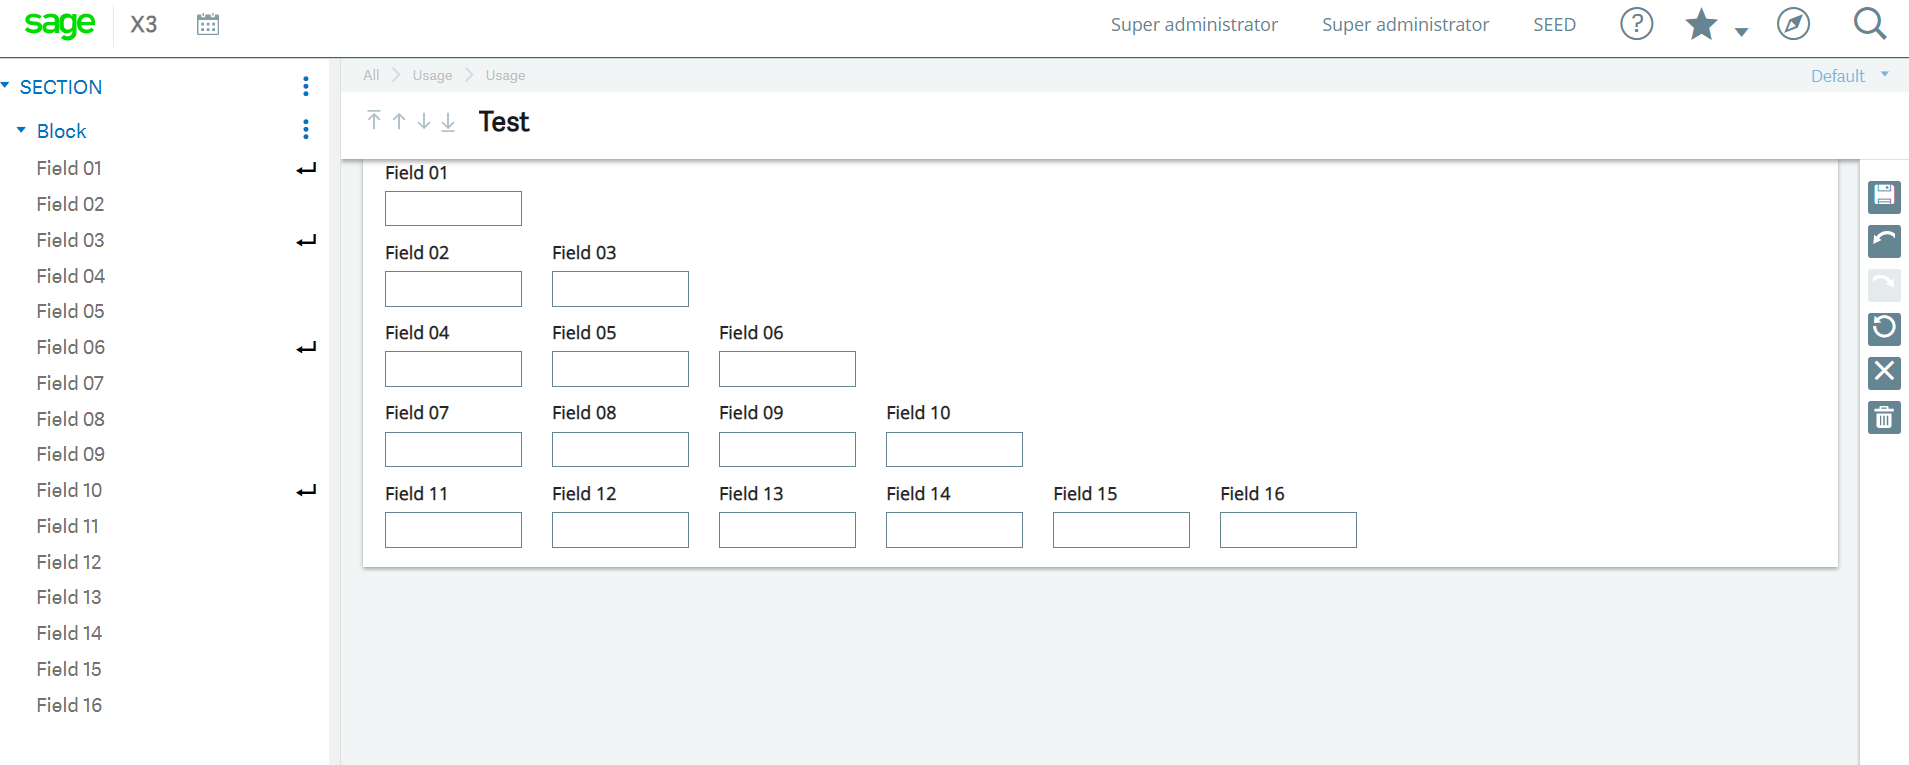
Save the changes and validate the screen and after that global validating the respective window. You will be able to see the fields in the next line wherever select yes in the break after the option as shown in below figure.
For personalizing the screen layout, navigate to the screen and click on the text “Default” at the top right corner of the screen and then click on “Customize page” option as shown in below figure.
After clicking on the “Customize page” option below screen appears where you will be able to see the sections and blocks in the screen in the left list of the screen.
We can use the break-after option directly here while customizing the layout. Just click on the “Enter key symbol” for applying break after a particular field as shown in below figure.
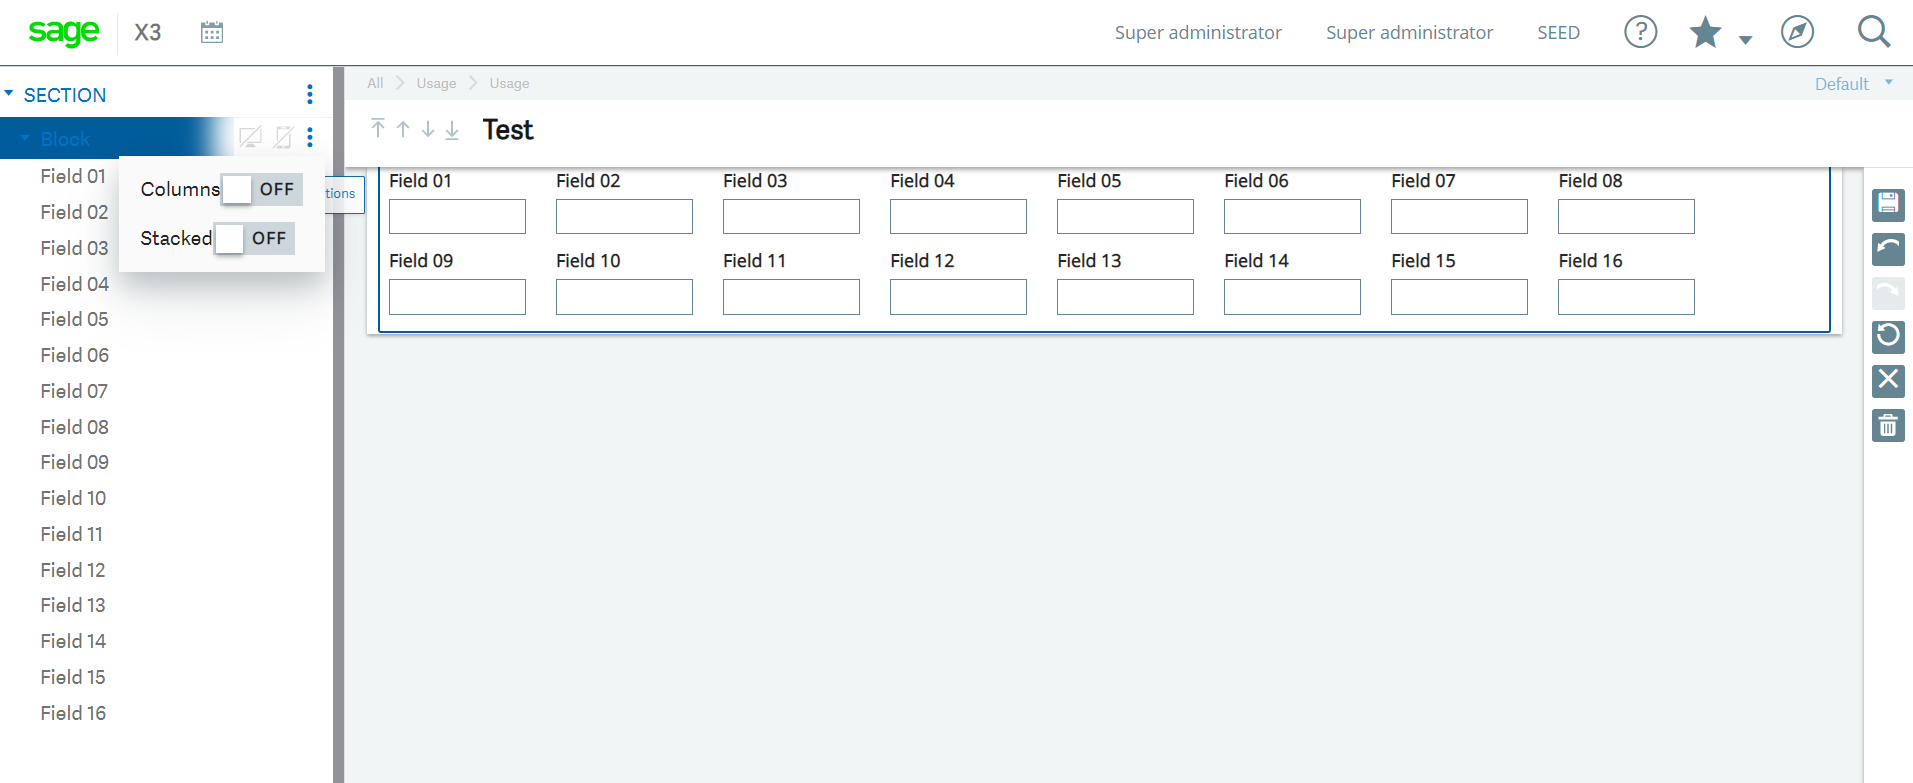
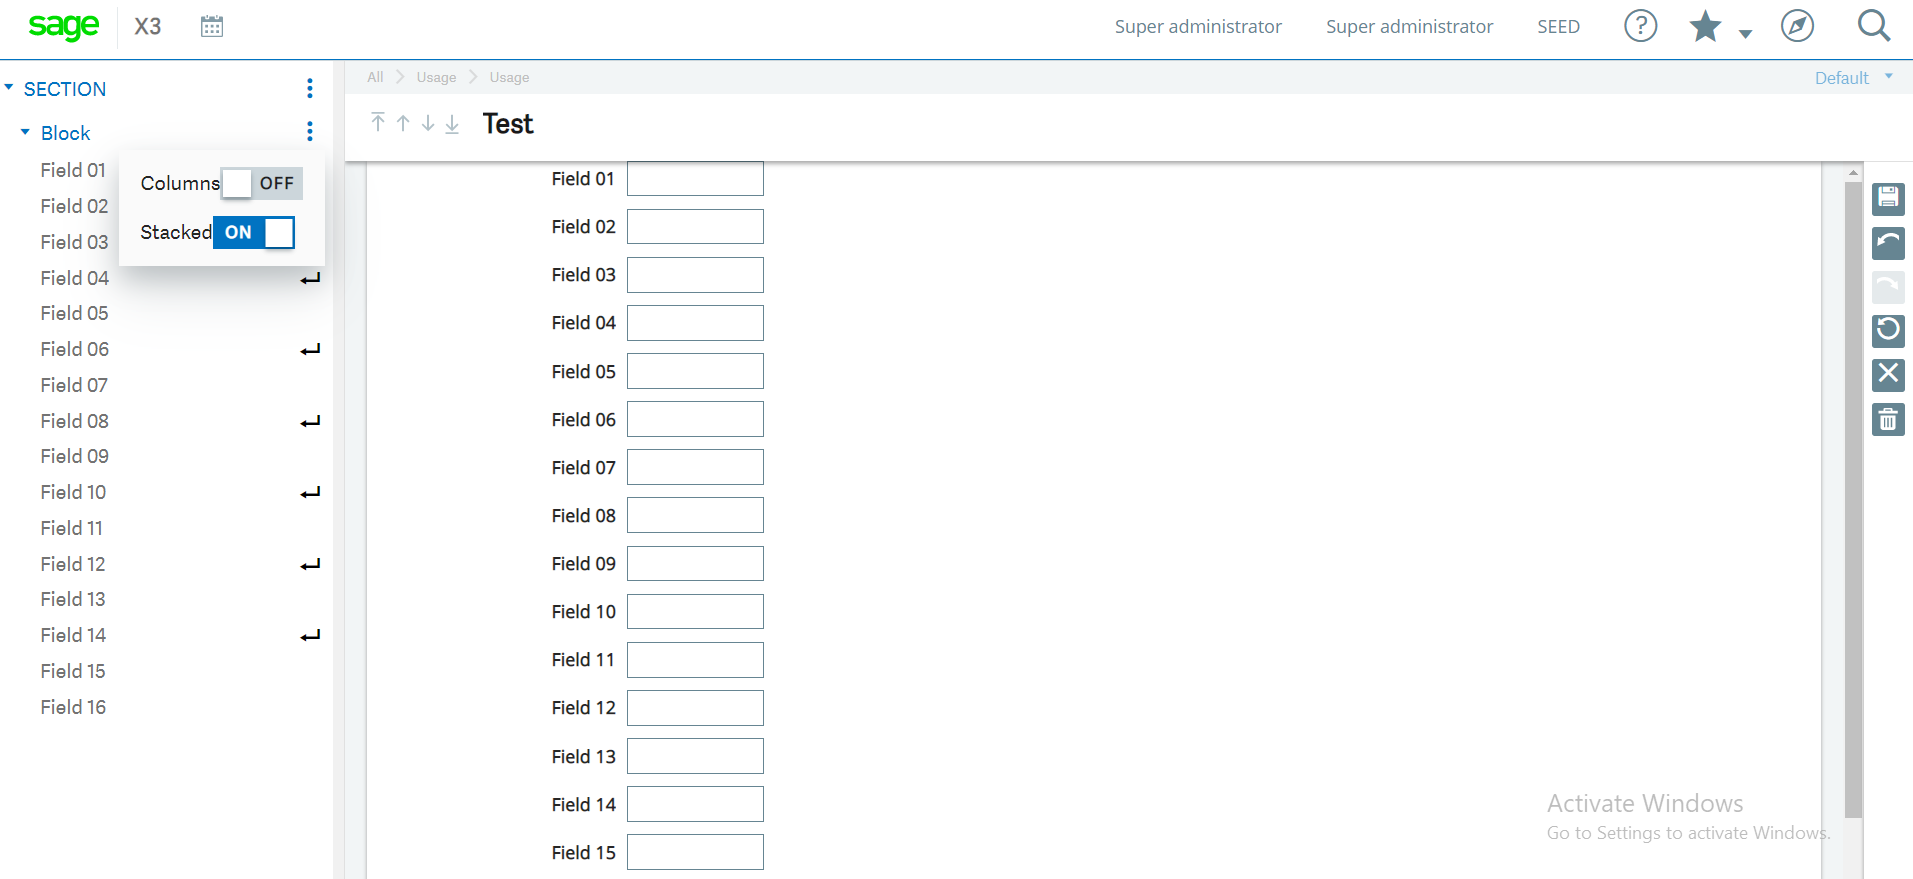
In the left list of screen, on clicking three dots in the block you will be able to see two options “Columns” and “Stacked” as shown in below figure.
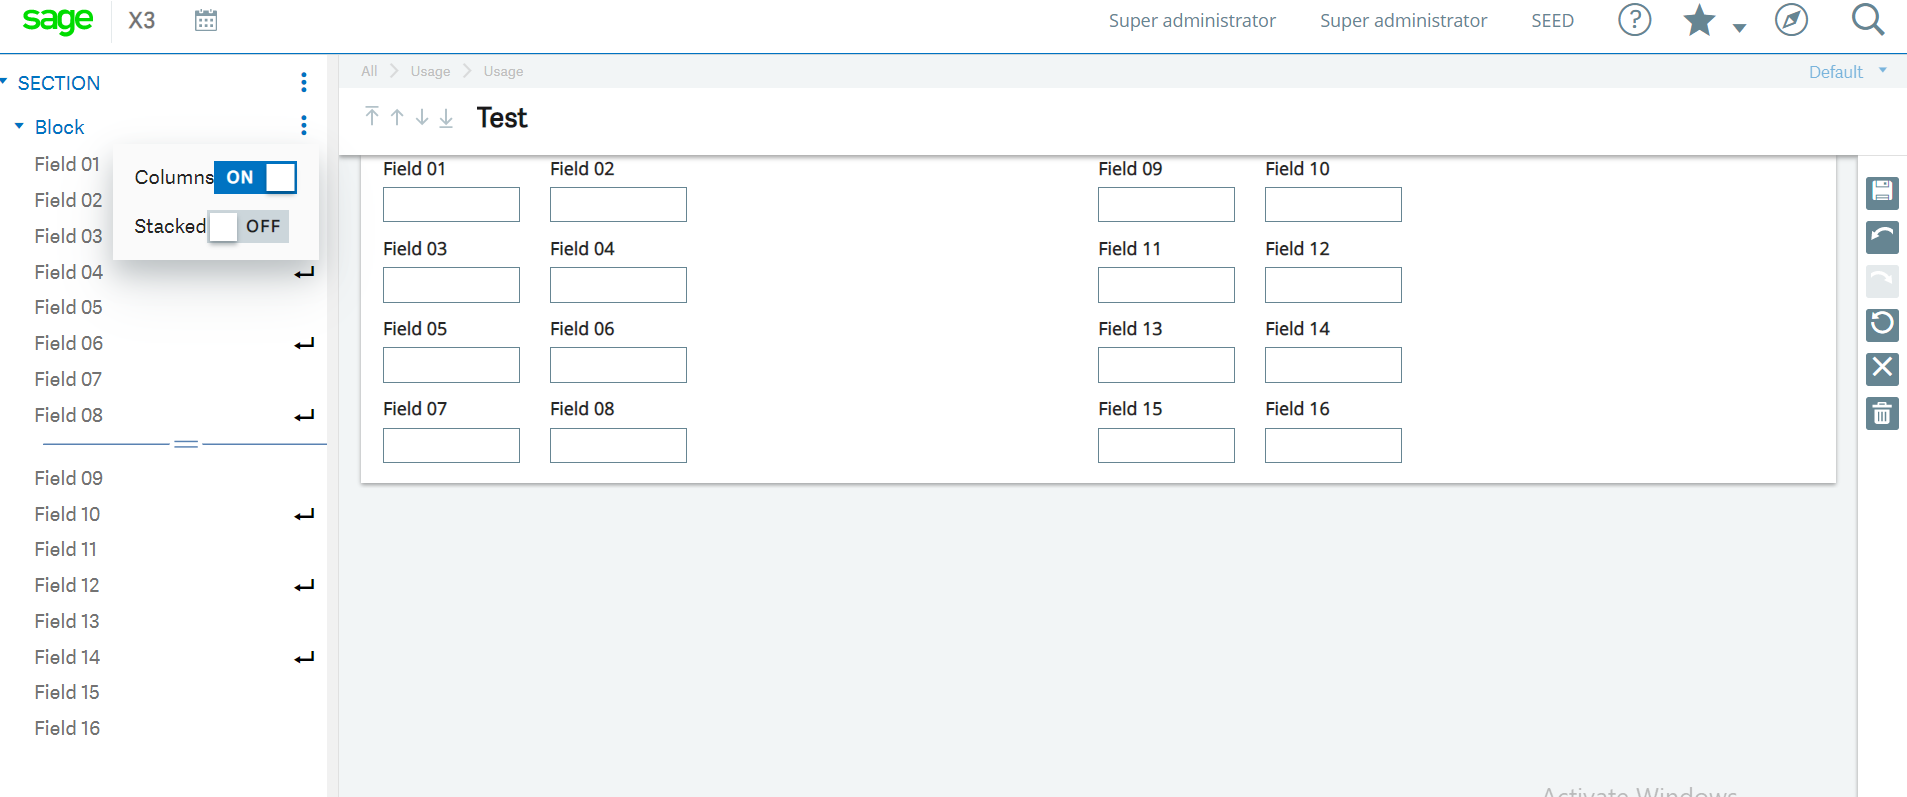
After selecting “ON” in columns, the fields will get aligned in columns format as shown in below figure.
After selecting “ON” in stacked, the fields will get aligned in stacked format as shown in below figure.
Click on Save button and then click on “Save as” button.
After that, the below screen will pop up and enter the fields such as code, title, and description, and select global in save as an option in the layout configuration.
After clicking on the OK button, you will be able to see your personalized layout for a particular screen
This blog helps us to personalize the layout of a particular screen in Sage X3 V12.
About Us
Greytrix – a globally recognized and one of the oldest Sage Development Partners is a one-stop solution provider for Sage ERP and Sage CRM organizational needs. Being acknowledged and rewarded for multi-man years of experience and expertise, we bring complete end-to-end assistance for your technical consultations, product customizations, data migration, system integrations, third-party add-on development, and implementation competence.
Greytrix has some unique integration solutions developed for Sage CRM with Sage ERPs namely Sage X3, Sage Intacct, Sage 100, Sage 500, and Sage 300. We also offer best-in-class Sage ERP and Sage CRM customization and development services to Business Partners, End Users, and Sage PSG worldwide. Greytrix helps in the migration of Sage CRM from Salesforce | ACT! | SalesLogix | Goldmine | Sugar CRM | Maximizer. Our Sage CRM Product Suite includes addons like Greytrix Business Manager, Sage CRM Project Manager, Sage CRM Resource Planner, Sage CRM Contract Manager, Sage CRM Event Manager, Sage CRM Budget Planner, Gmail Integration, Sage CRM Mobile Service Signature, Sage CRM CTI Framework.
Greytrix is a recognized Sage Champion Partner for GUMU™ Sage X3 – Sage CRM integration listed on Sage Marketplace and Sage CRM – Sage Intacct integration listed on Sage Intacct Marketplace. The GUMU™ Cloud framework by Greytrix forms the backbone of cloud integrations that are managed in real-time for the processing and execution of application programs at the click of a button.
For more information on our integration solutions, please contact us at sage@greytrix.com. We will be glad to assist you.