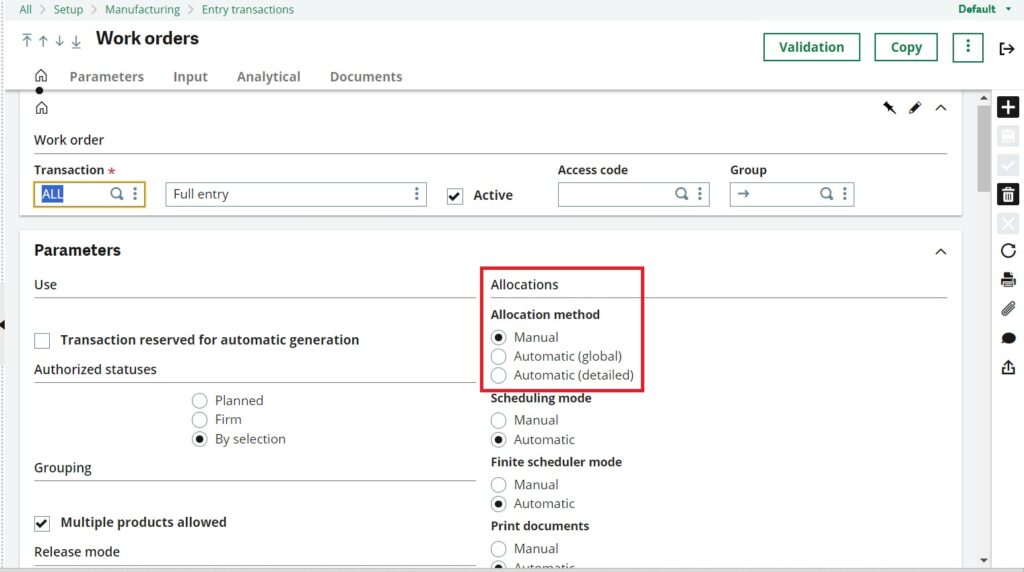
In Sage X3, a work order is a document that is used to plan and track the production of items in a manufacturing or production environment. Work orders are an essential part of the manufacturing process that can be the “Manual,” “Global,” and “Detailed” allocation methods are options you can choose when allocating materials to a work order. These methods determine how materials are assigned to the work order, and they differ in terms of flexibility and automation.
To find allocation methods use path as :
1. Manual Allocation:
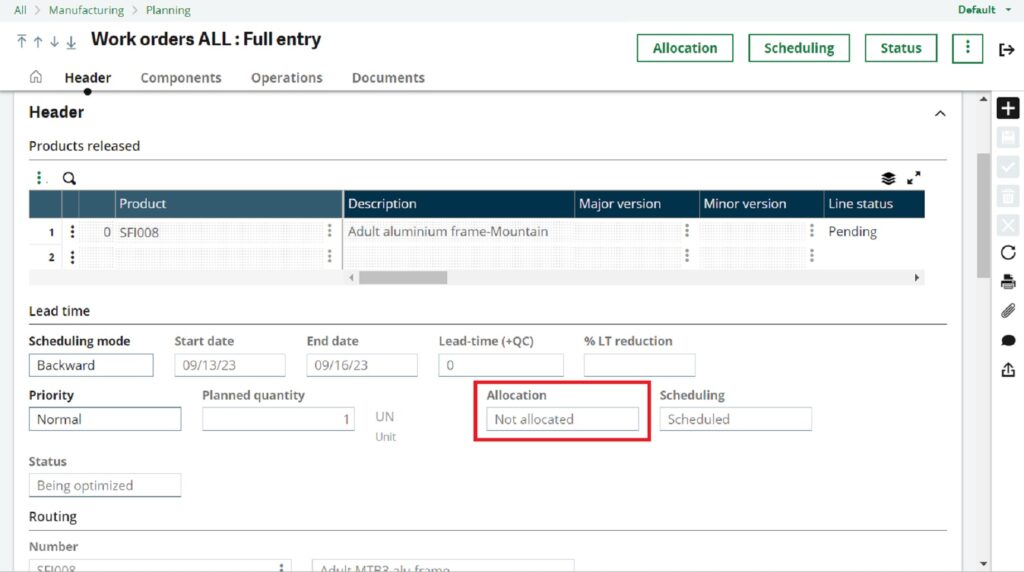
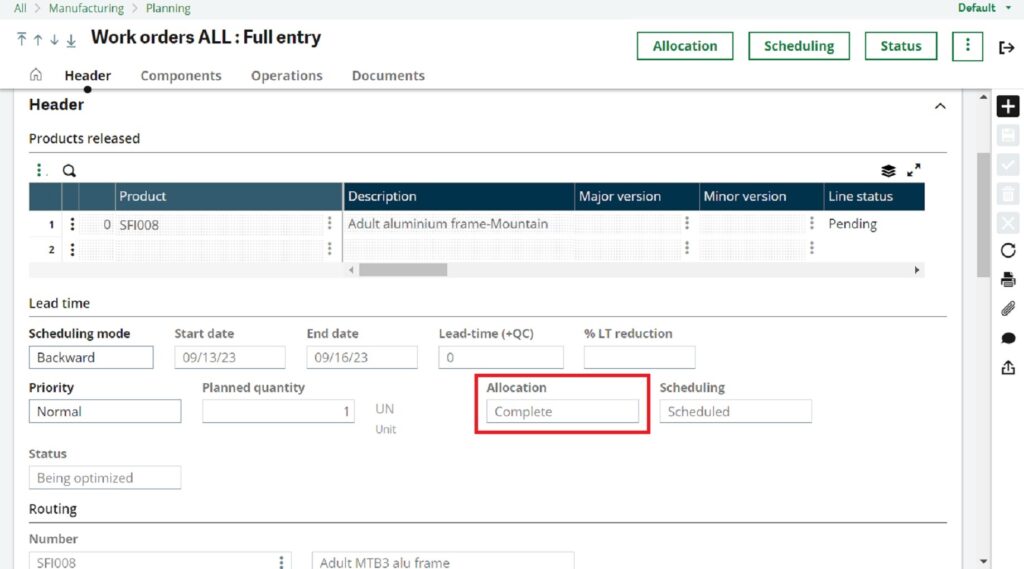
After creating a work order with the Manual allocation method, the Allocation field will initially display “Not allocated.” To complete it, you need to manually select either the Global or Detailed method by clicking the Allocation button in the top right corner, as display in fig 1.1
To find the work order screen use path as :
All -> Manufacturing -> Planning -> Work order
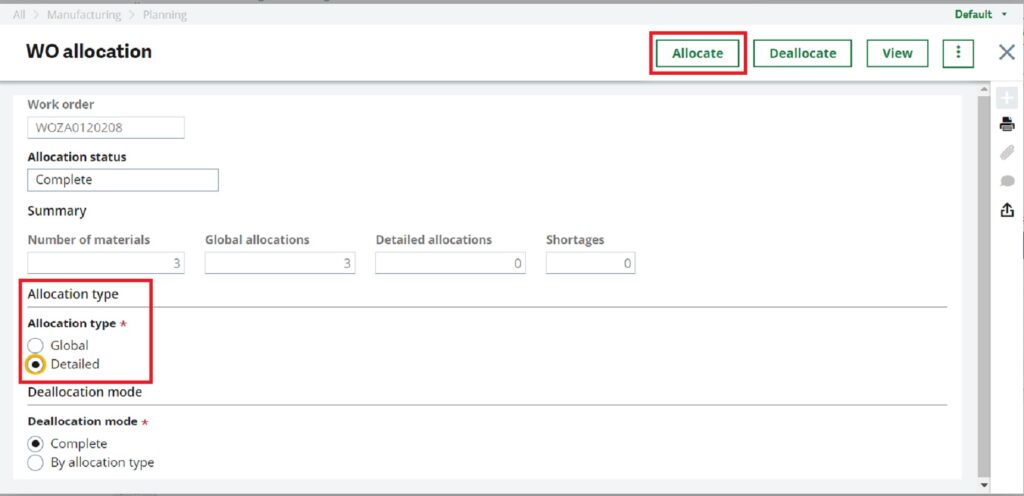
To complete the allocation, click the Allocation button in the top right corner, choose either the Global or Detailed allocation system, then click Allocate. This action will mark the allocation as complete, as shown in fig 1.2
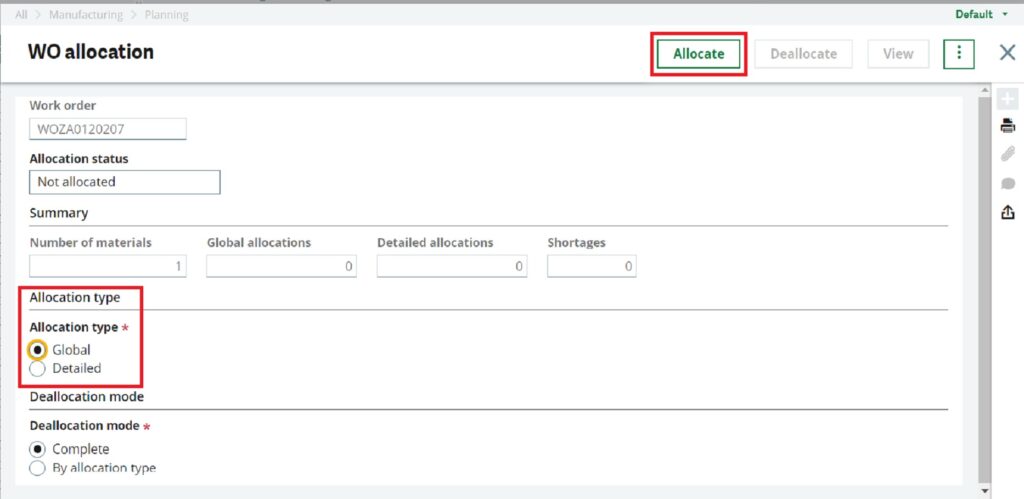
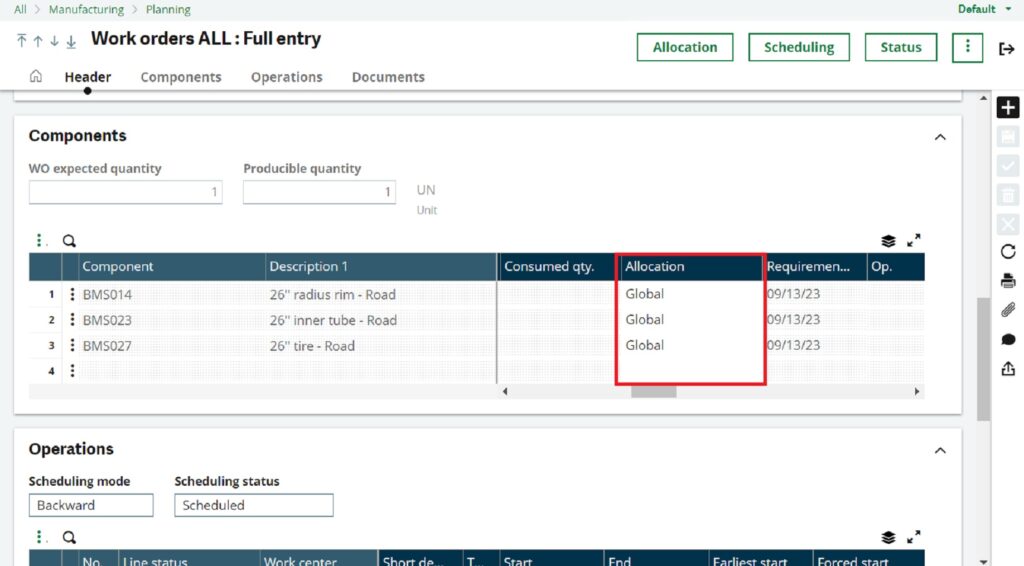
After the above process it will make allocation type from “Not allocated” to “Complete”, as shown in fig 1.3

2. Automatic (Global)
In the global allocation method, materials are assigned to the work order automatically using pre-established rules and criteria. These allocation rules are configured ahead of time, and when you create the work order, the system automatically applies these rules.
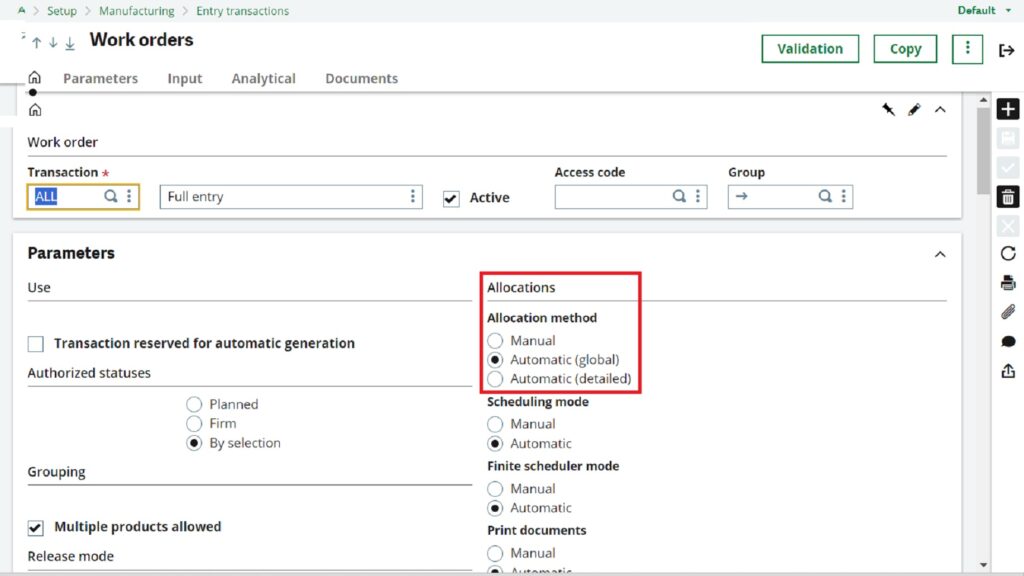
To implement this, simply switch the allocation method to “Automatic (Global)” during the work order entry transaction, as shown in Figure 2.1
Once a work order is created with the allocation method set to “Automatic (Global),” the system will automatically generate the work order and mark the allocation as complete, as shown in Figures 2.2 and 2.3
NOTE :
With the “Automatic (Global)” allocation method, you have the flexibility to switch to “Automatic (Detailed)” if needed. However, it’s important to note that once a work order is created with the “Automatic (Detailed)” allocation method, you cannot make any changes in the allocation method.
To make changes when the allocation method is set as “Automatic (Global),” you can simply click on the Allocation button, select the desired allocation method if necessary, and then click on the “Allocate” button. This action will apply the selected allocation method to the work order, as shown in fig 2.4
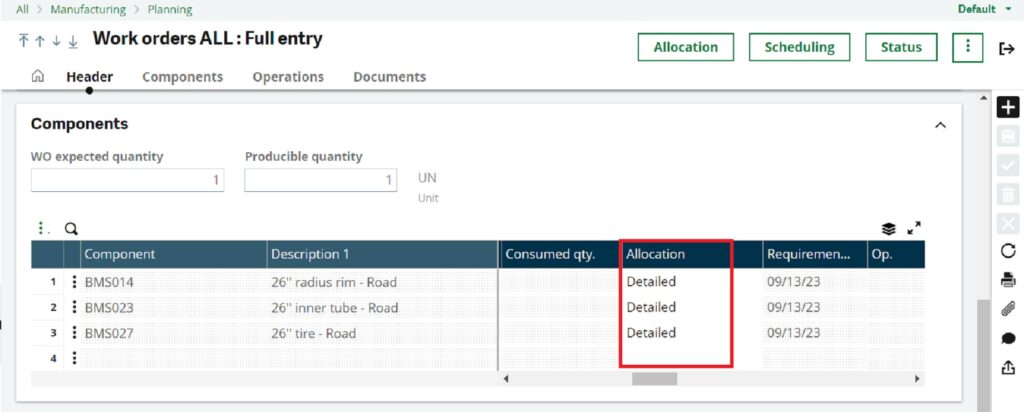
Once you’ve made changes to the allocation type, such as switching it to “Detailed,” the allocation method will reflect this adjustment as “Detailed,” as illustrated in Figure 2.5.
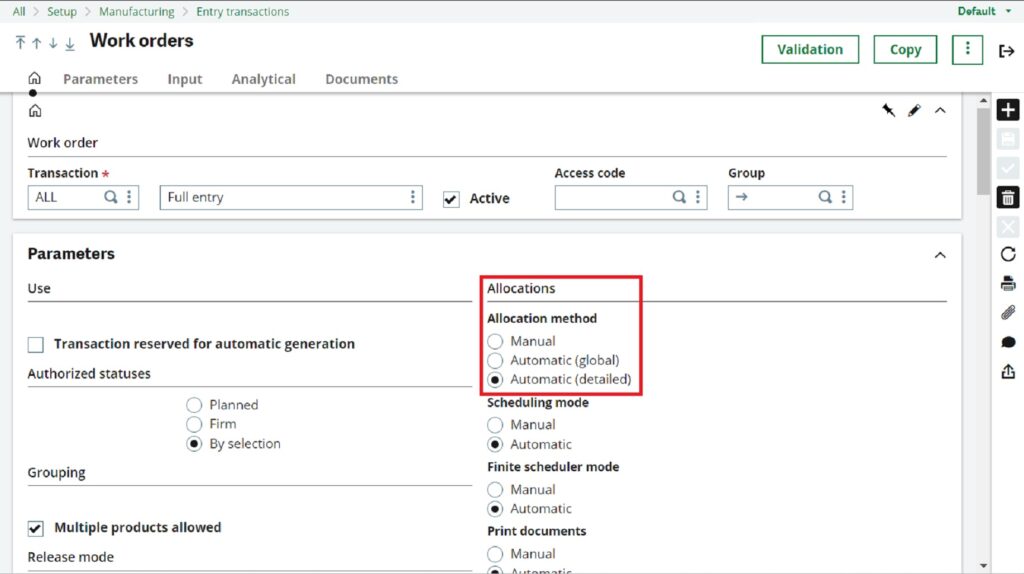
3. Automatic (Detailed) :
In the Detailed allocation method, materials are assigned to the work order automatically and it will display allocation as completed after creating work order
To implement this, simply switch the allocation method to “Automatic (Detailed)” during the work order entry transaction, as shown in Figure 3.1
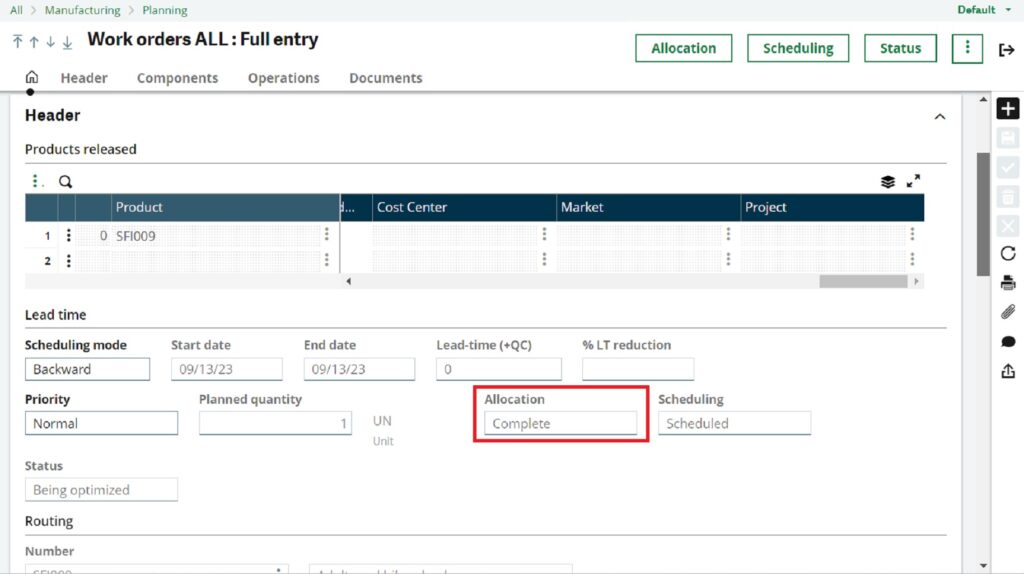
Once a work order is created with the allocation method set to “Automatic (Detailed),” the system will automatically generate the work order and mark the allocation as complete, as shown in Figures 3.2 and 3.3

1. Manual Allocation is the most manual and flexible method, where you manually select and assign materials.
2. Global Allocation provides some automation by applying predefined rules but still allows for customization through rule configuration.
3. Detailed Allocation offers granular control at the component level, allowing you to specify exact quantities of materials for each component in the work order.
About Us
Greytrix – a globally recognized Premier Sage Gold Development Partner is a one-stop solution provider for Sage ERP and Sage CRM needs. Being recognized and rewarded for multi-man years of experience, we bring complete end-to-end assistance for your technical consultations, product customizations, data migration, system integrations, third-party add-on development and implementation expertise.
Greytrix caters to a wide range of Sage X3 (Sage Enterprise Management) offerings – a Sage Business Cloud Solution. Our unique GUMU™ integrations include Sage X3 for Sage CRM, Salesforce.com and Magento eCommerce along with Implementation and Technical Support worldwide for Sage X3 (Sage Enterprise Management). Currently we are Sage X3 Implementation Partner in East Africa, Middles East, Australia, Asia. We also offer best-in-class Sage X3 customization and development services, integrated applications such as POS | WMS | Payment Gateway | Shipping System | Business Intelligence | eCommerce and have developed add-ons such as Catch – Weight and Letter of Credit for Sage X3 to Sage business partners, end users and Sage PSG worldwide.
Greytrix is a recognized Sage Rockstar ISV Partner for GUMU™ Sage X3 – Sage CRM integration also listed on Sage Marketplace; GUMU™ integration for Sage X3 – Salesforce is a 5-star app listed on Salesforce AppExchange.
For more information on Sage X3 Integration and Services, please contact us at x3@greytrix.com. We will be glad to assist you.